Axis Control: My Top 5 Motion Control Instructions in TIA Portal
Mar 18, 2023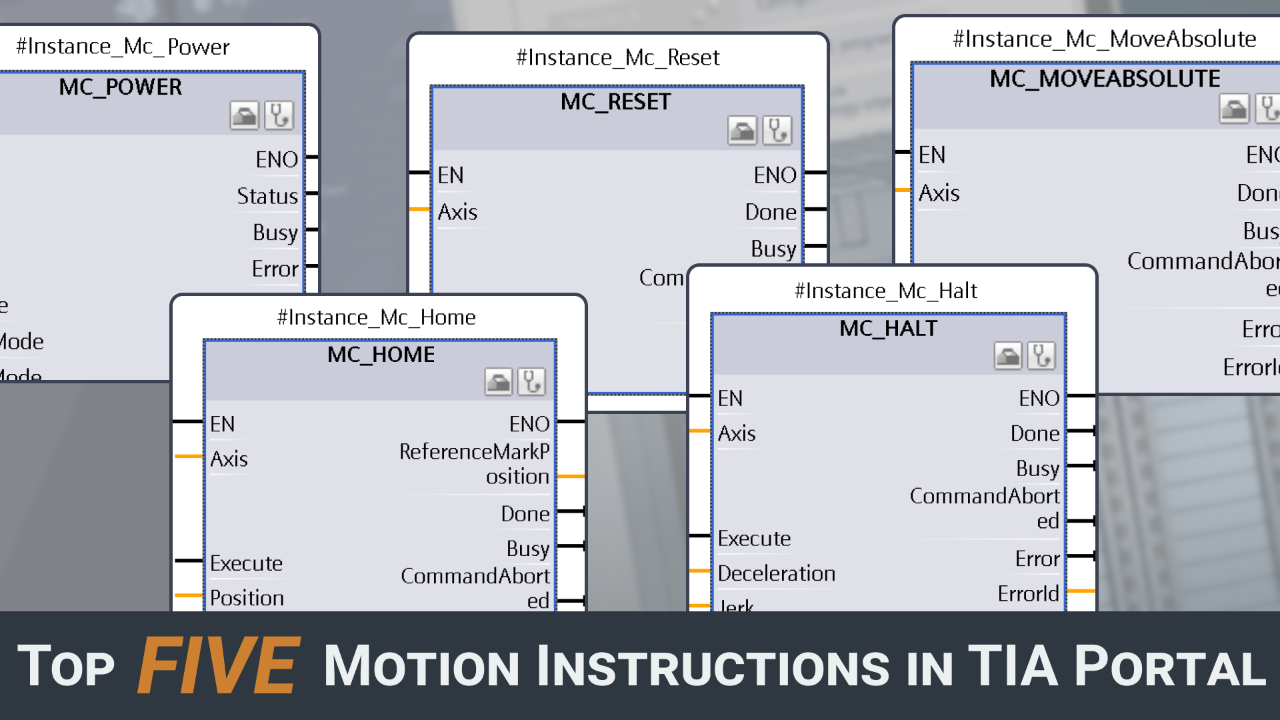
Did you know that your TIA Step 7 library comes equipped with an extensive range of motion instructions?
If you've checked my earlier posts, you may have come across a GUIDE where I lay out a 5 step plan to add and configure a servo axis for an S7-1500 PLC. This post was mostly hardware focused, where today we'll continue with the software side of controlling an axis in your PLC application.
In today's post, I'll be sharing with you 5 essential motion control instructions - five blocks that I always include in my motion applications - for controlling a servo axis in TIA Portal.
You'll discover which instructions to use for:
- Enabling/disabling an axis
- Referencing an axis
- Clearing faults on an axis
- Stopping an axis
- Moving an axis
So unless you're working with more advanced applications like synchronised motion, virtual axes or kinematics, these 5 instructions are all you need to get a positioning or a speed-controlled axis up and running on your machine.
Now, before we dive into each instruction, I'd first like to point out a couple of outputs that these instructions share. These status outputs provide you - the PLC programmer - with valuable information on the job execution of the motion instruction.
▶ Done - Job completed successfully
▶ Busy - Job is currently being processed
▶ CommandAborted - Job was terminated by another job during execution
▶ Error - An error occurred while processing the job
▶ ErrorId - Displays the cause of the error in hexadecimal format
Personally, I like to use these outputs for troubleshooting purposes. Especially the ErrorId comes in very handy when somehow a motion instruction did not execute succesfully. If you go to the TIA help file (Information system) and search for "Error ID for motion control instructions", you will find a list of all the hexadecimal ErrorIDs together with an explanation on how to solve this type of fault.

Very useful!
Now how about we leave this introduction behind us, and let's move on to the interesting stuff!
MC_POWER
Before you can start moving your servo axis, it needs to be powered on and enabled. Without any current running flowing to your axis, there will be no position control.
Fortunately, TIA Portal's MC_POWER instruction let's you enable and disable your axis effortlessly.

Simply energize the Enable input, and the axis is powered up and ready for action. With the axis enabled, you are can then easily perform a full set of Motion Control instructions, including jogging and precise movement, all with the power of your S7-1500.
Use the StartMode input to define if your axis should be enabled position-controlled (value 1) or not position-controlled (value 0). Personally I only work with position-controlled axes, so I always have this set to "1".
With the StopMode input, you can configure which deceleration to use when disabling the axis.
- 0 = Emergency stop
When the Enable input goes to FALSE, the axis brakes to a standstill using the emergency deceleration configured in the technology object (Axis.DynamicDefaults.EmergencyDeceleration). No jerk limit is used here and the axis switches off after standstill. - 1 = Immediate stop
When the Enable input goes to FALSE, the axis sets the setpoint to 0 and brakes to a standstill according to the configuration in the drive. Afterwards, the axis switches off. - 2 = Stop with maximum dynamic values
When the Enable input goes to FALSE, the axis is braked to a standstill using the maximum deceleration and jerk configured in the drive (Axis.DynamicLimits.MaxDeceleration; Axis.DynamicLimits.MaxJerk). After standstill, the axis switches off.
A TRUE signal on the Status output of this block indicates that the axis is enabled. So you can use this as a condition for other MC instructions that are dependent on the axis being enabled (e.g. before moving an axis, the axis needs to be enabled first).
Finally, I'd recommend to add these recommendations below to your PLC logic to avoid faulty execution of the MC_POWER instruction and to ensure seamless operation of your axis.
✅ Before enabling the MC_POWER instruction, make sure that the bus communication between the PLC and the drive is functioning correctly (check Axis.StatusDrive.CommunicationOK)
✅ Check that the axis is free of errors by executing an Mc_Reset before enabling the instruction
✅ If you are using STO (Safe Torque Off), ensure that your STO signal is inactive (i.e., safety is OK) before enabling the instruction
Just add these as conditions before your execute command, and you're all set!
MC_HOME
Did you know that there are 5 different ways to reference a servo axis in TIA Portal?
Referencing a servo axis is the process of establishing a known position or location for the axis of a servo motor in reference to the mechanical setup of your machine. This is typically done at the start of a motion control system's operation or after a system has been shut down or restarted.
Referencing is an important part of setting up and configuring your motion control system, as it ensures that the system is operating correctly and that the axis of the servo motor is moving accurately and reliably.
In TIA Portal, you reference a servo axis using the MC_HOME instruction.

When using the Motion Control instruction MC_HOME to reference your servo axis, the Mode input can be configured as follows:
- Passive homing
- Active homing
- Set actual position
- Relative offset to the actual position
- Absolute encoder position offset
IMPORTANT - Which homing mode you can use for your axis depends on the type of encoder you have. You’ll either have an incremental encoder (single-turn) or an absolute encoder (multi-turn).
An axis with an incremental encoder does not retain it’s position after a powercycle. You’ll have to home your axis after each powercycle.
An axis with an absolute encoder retains it's position after a powercycle so no need to home after each powercycle. If you have an absolute encoder, you’ll typically execute a homing at commissioning, and after the axis or gearbox (if present) has been removed from the machine.
TIP - Your axis should be fault-free when executing a home command. Start by executing an MC_RESET before homing the axis.
MC_RESET
There are many reasons why an axis can go into a faulty state:
▶ Wrong parametrization
▶ Current overload
▶ Positioning error
▶ Encoder feedback error
▶ Software/hardware limit reached
▶ Etc...
In some instances, these faults may be caused by human error - such as incorrect parameter data input (I know I've been there). While in other cases, they may be beyond our control - like the axis utilizing more torque over time due to increasing mechanical friction in the system.
But don't panic if your axis is acting up, TIA Portal has got your back with the MC_RESET instruction.

Executing this Motion Control instruction will attempt to clear all technology alarms associated with the axis.
TIP - To avoid errors during the execution of MC_POWER or MC_HOME instructions, I'd recommended to first execute an MC_RESET instruction.
Setting the Restart input to TRUE during the execution of MC_RESET will cause the axis to be reinitialized. This is particularly useful when changes have been made to the configuration data of the axis. By restarting the axis, the new configuration data will be implemented. Make sure your axis is not enabled when using the restart function (else you'll get an error).
MC_HALT
Did you know that there are two dedicated motion instructions in TIA Portal that allow you to stop your axis?
1️⃣ The first instruction, MC_HALT, is typically used in regular situations where you simply want to stop a moving axis and then follow up with new motion commands.

2️⃣ The second instruction, MC_STOP, is reserved for special situations where you need to halt the axis and prevent any other motion jobs on it, such as in an emergency stop scenario.

You can define your stop profile using the Deceleration input (units/s2) and the Jerk input (units/s3).
▶ Deceleration refers to the rate of change in velocity when it is decreasing (whereas acceleration pertains to the rate of change in velocity when it is increasing).
▶ Jerk, in turn, is the derivative of deceleration, or in other words the rate of change in deceleration when it is either increasing or decreasing.
When your axis is accelerating, executing the MC_HALT with the AbortAcceleration input set to TRUE will trigger an immediate transition to the deceleration phase. This means that the axis will not first gradually decrease its acceleration to zero.
Similar to other Motion Control instructions in TIA Portal, the MC_HALT instruction provides output signals that indicate the current status of the instruction - such as whether it is in progress or has been completed (Busy, Done), as well as any errors that may have arisen during execution (Error, ErrorId).
MC_MOVE
So far, we've covered how to enable an axis, how to reference an axis, how to reset axis faults, and how to stop a moving axis. But let's not forget the most crucial part - how do we actually make an axis MOVE?
And here's the twist, there are not one, not two, but FIVE distinct ways to do it.
Here's how each of them works:
▶ MC_MOVEABSOLUTE: This instruction moves your axis to an absolute position. For example, if your axis is currently at position 25 mm and you execute the instruction with the Position input set to 50 mm, then the axis will move to position 50 mm and stop there.

▶ MC_MOVERELATIVE: This instruction moves your axis a relative distance. For instance, if your axis is currently at position 25 mm and you execute this instruction with the Distance input set to 50 mm, the axis will move to position 75 mm and stop there.

▶ MC_MOVEJOG: This instruction runs your axis in a forward or backward direction at a constant velocity.

▶ MC_MOVEVELOCITY: This instruction moves the axis at a constant velocity (Input) in a defined direction (Input).

▶ MC_MOVESUPERIMPOSED: This instruction moves the axis a relative distance on top of an active basic motion (comparable to walking forward or backward on a moving train!).

Important Note:
Except for MC_MOVEJOG, all instructions are executed with a positive edge of the Execute input signal. Therefore, once the instruction has been executed, it will not stop by removing the signal. If you need to stop the axis before the move is completed, you will need to execute either MC_HALT or MC_STOP.
With the MC_MOVEJOG, the axis will only run as long as the Input signal (JogForward or JogBackward) is TRUE.
As far as inputs go, you can tailor the move profile for each of the five instructions to your liking by adjusting the Velocity, Acceleration, Deceleration, and Jerk inputs.
So that's it for this post. I hope you enjoyed the read and are looking forward to the next one.
-Hans
Download your FREE GUIDE NOW!
5 Simple Steps to Drastically Improve your PLC Program Structure in TIA Portal by Hans Schrynemakers
This is one of my most popular guides, and I’m happy to share it with you for free! Inside, you'll learn about:
- The #1 Way to Eliminate Messy PLC Programming in Just 5 Easy Steps!
- The Proven Method for Building Scalable, Future-Ready PLC Applications in TIA Portal.
- Discover How Modular Design and Structured Data Can Eliminate Costly Errors and Downtime.
- Break Free from Unstructured Programming - Build Clear, Modular TIA Portal Applications with Confidence.
- Master the Techniques that Separate Amateur PLC Programmers from Professionals.