How to Download and Install the Siemens Eigen Engineering Agent AI (Free Trial)
Nov 03, 2026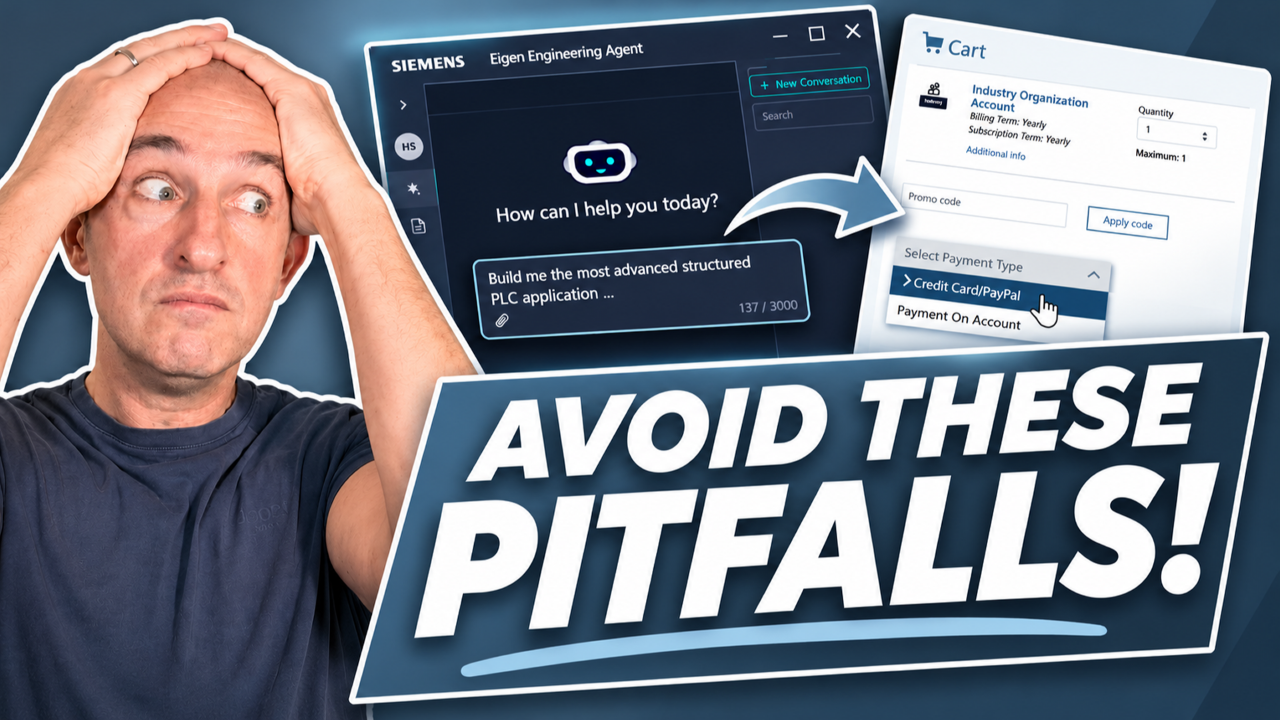
Downloading a free software trial should be easy, right?
You click a button, create an account, download the setup file, install the software, and you're ready to go.
Well… apparently not with the Siemens Eigen Engineering Agent.
AI is everywhere right now, and Siemens has entered the game with its own AI assistant for TIA Portal. According to Siemens, the Eigen Engineering Agent can deliver up to 50% efficiency gains by helping with PLC programming, HMI visualization, device configuration, and other engineering tasks.
Naturally, I wanted to give it a try. But before you can actually start testing the Agent, you first need to get through the sign-up process. And that process is not as straightforward as you might expect.
That's why I created this step-by-step guide. I'll show you how to sign up for the Siemens Eigen Engineering Agent 1-month free trial, create the required Industry Organization Account, find the actual download link, install the Agent on your system, and cancel your subscription before it turns into a paid yearly license.
Along the way, I'll also point out a few things that confused me, so you can hopefully avoid running into the same problems.
Let's get started!
1 - Finding the Siemens Eigen Engineering Agent Free Trial
First things first: where do you actually sign up for the Eigen Engineering Agent free trial?
Start by opening your browser, go to your favorite search engine, and search for "Download Eigen Engineering trial version".
You should find a Siemens search result called "Eigen Engineering Agent", with a description mentioning the 1-month free trial. Depending on your search engine, you might first see an AI-generated answer, but the actual Siemens website should appear somewhere below it.

Once you open the link, you'll arrive at the official Siemens Eigen Engineering Agent landing page. Here you'll immediately notice two buttons: "Request a quote" and "Buy the agent now". But we don't want to request a quote or buy anything just yet. We simply want to try the software.
Scroll down until you find the section titled "Try now with a free 1-month trial", as shown in the screenshot below, and click "Learn More".

This takes you to the Siemens Dex platform, where you should finally see the option "Try 1 month free". However, before clicking that button, there's something important you should know about this trial.

The free trial automatically becomes a paid subscription
When I signed up, Siemens displayed the following information in the small print: "US Dollar 2100 per subscription after trial period."
That's right. You can try the Eigen Engineering Agent for one month for free, but unless you cancel the subscription in time, it automatically turns into a paid yearly subscription. And that subscription certainly isn't cheap.
Personally, I'm not a big fan of this approach. Why not simply offer a trial version like TIA Portal, where you download the software, use it for a limited period, and then purchase a license if you want to continue? That would make things a lot easier and probably encourage more engineers to try the tool.
But anyway, that's how Siemens has decided to handle the trial. And unfortunately, this is only the first obstacle you'll encounter during the registration process.
One important thing to remember is that Siemens requires you to cancel the subscription at least 3 days before the renewal date. I recommend creating a calendar reminder approximately three weeks after starting your trial, so you have enough time to cancel before any charges occur. Siemens also sends reminder emails, but I wouldn't rely on those alone.
Alternatively, you can disable automatic renewal immediately after activating the trial. I'll explain how to do that in Chapter 6.
For now, let's continue with the registration. But before we can actually sign up for the free trial, we first need to take care of another requirement: the Industry Organization Account.
2 - Creating Your Industry Organization Account
On the Siemens Dex page, you'll notice something interesting just below the Eigen Engineering Agent icon. It says "Prerequisites – 1 required – Industry Organization Account", as shown in the screenshot below.
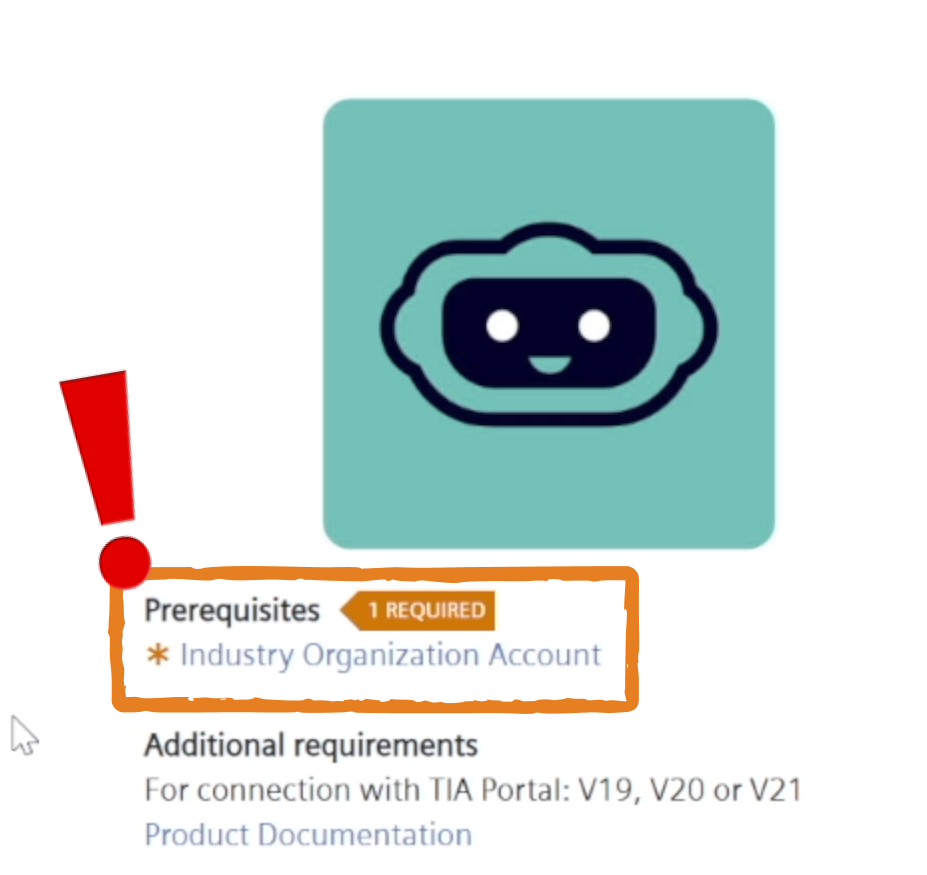
What's that supposed to mean? Well, this was exactly where things became confusing for me. During my first attempt, I more or less ignored this requirement and continued with the free trial registration. But after going through several steps, I eventually reached a point where Siemens asked me to select an Industry Organization Account. And because I didn't have one, I couldn't continue.
So here's my recommendation: Create the Industry Organization Account before signing up for the Eigen Engineering Agent trial. This will save you from running into the same problem later.
What is an Industry Organization Account?
An Industry Organization Account is basically the organizational environment Siemens uses to manage engineering tools, subscriptions, licenses, and users. And importantly, it is not the same as your Siemens ID.
Your Siemens ID is your personal login, which you use to access Siemens websites and services. The Industry Organization Account, on the other hand, represents the company or organization behind that login and is used to manage its engineering software and subscriptions.
Luckily, creating the account is relatively straightforward once you know where to start. Go back to the Eigen Engineering Agent page and click the Industry Organization Account prerequisite link. This opens a separate page where you can register for the account.
Adding the Industry Organization Account to your cart
On the registration page, you'll notice that Siemens displays the price as "TOTAL: 0 USD per year". So the account itself is completely free, which is great. Except that Siemens still asks you to select a payment method. Yes, you read that correctly. You need to select a payment method for something that costs absolutely nothing.

Click "Add to Cart", followed by "View Cart". You'll now see your shopping cart containing the Industry Organization Account, but you might notice that the Checkout button is disabled. That's because you haven't selected a payment method yet.
Depending on the available options, you can choose between "Credit Card/PayPal" and "Payment on Account". Once you've selected a payment method, the Checkout button becomes available, and you can continue with the registration.
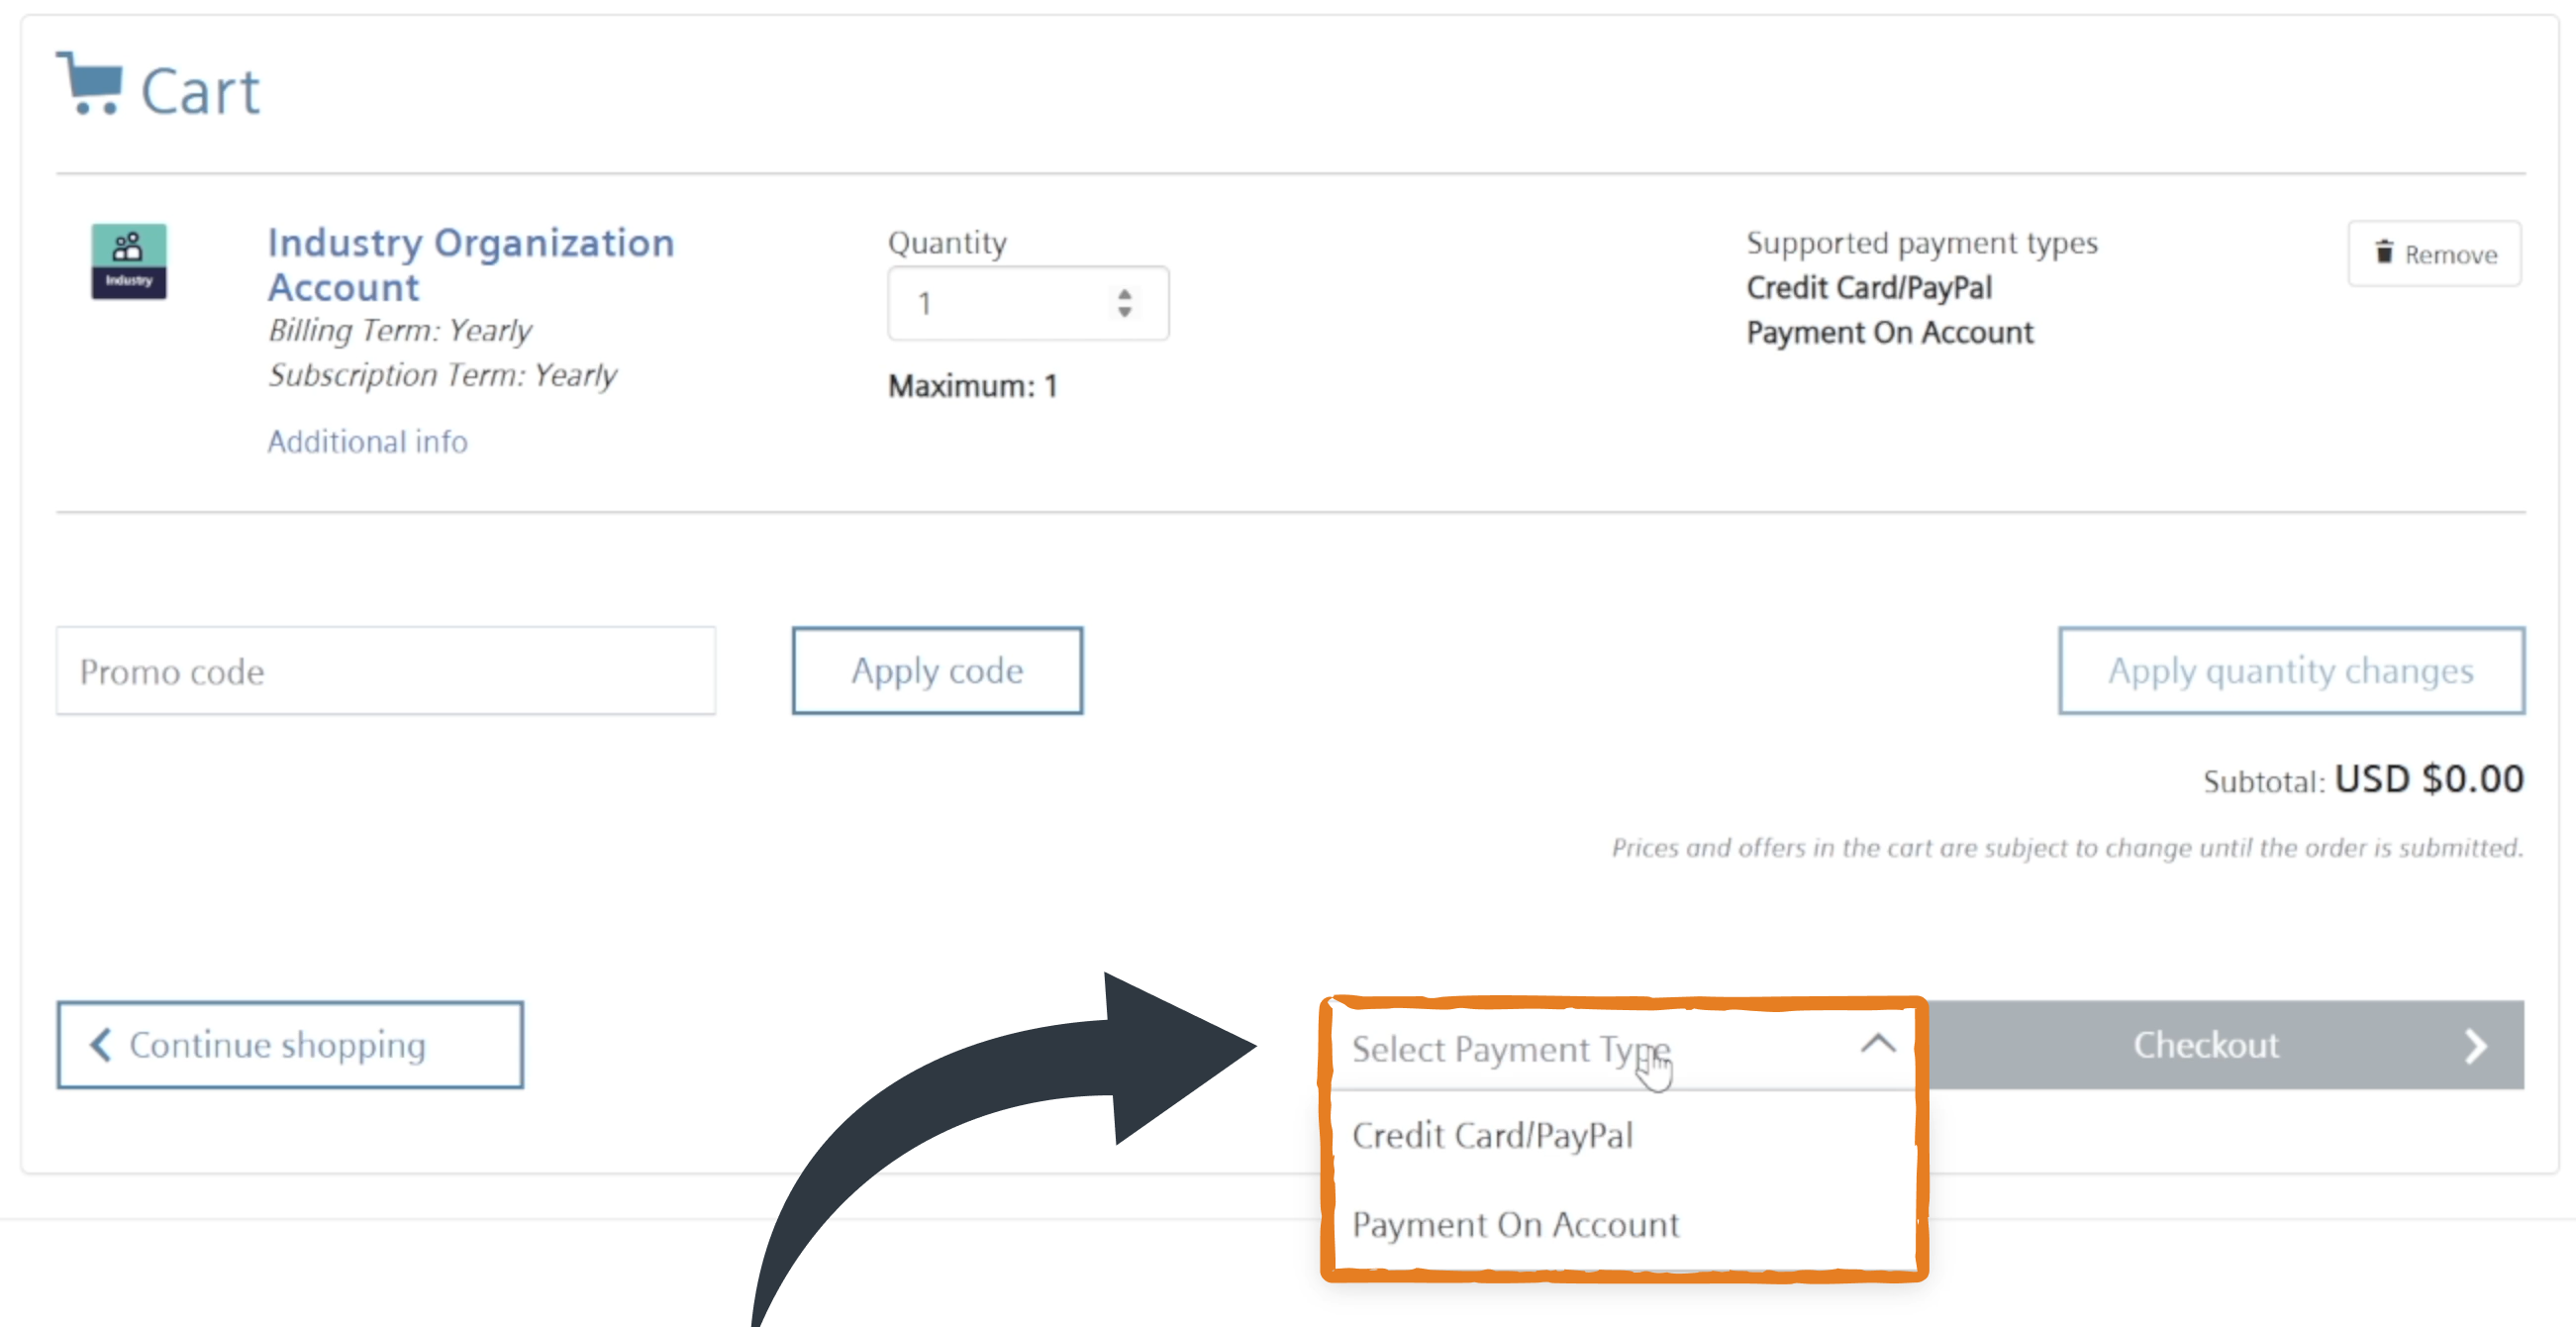
One thing worth mentioning is that Siemens may automatically change the website language and currency based on your location. In my case, it detected that I was in Austria and switched from English to German, with prices displayed in euros instead of dollars.
Interestingly enough, this also meant that I had to select the payment method again before I could continue. So don't be surprised if you encounter the same situation.
Entering your personal and company information
After checking out, Siemens takes you through a registration process consisting of several steps. The first step is to enter your personal and company information, including your phone number, company name, address, postal code, city, and country. Depending on where you live, Siemens might also ask for your province or region and VAT information.
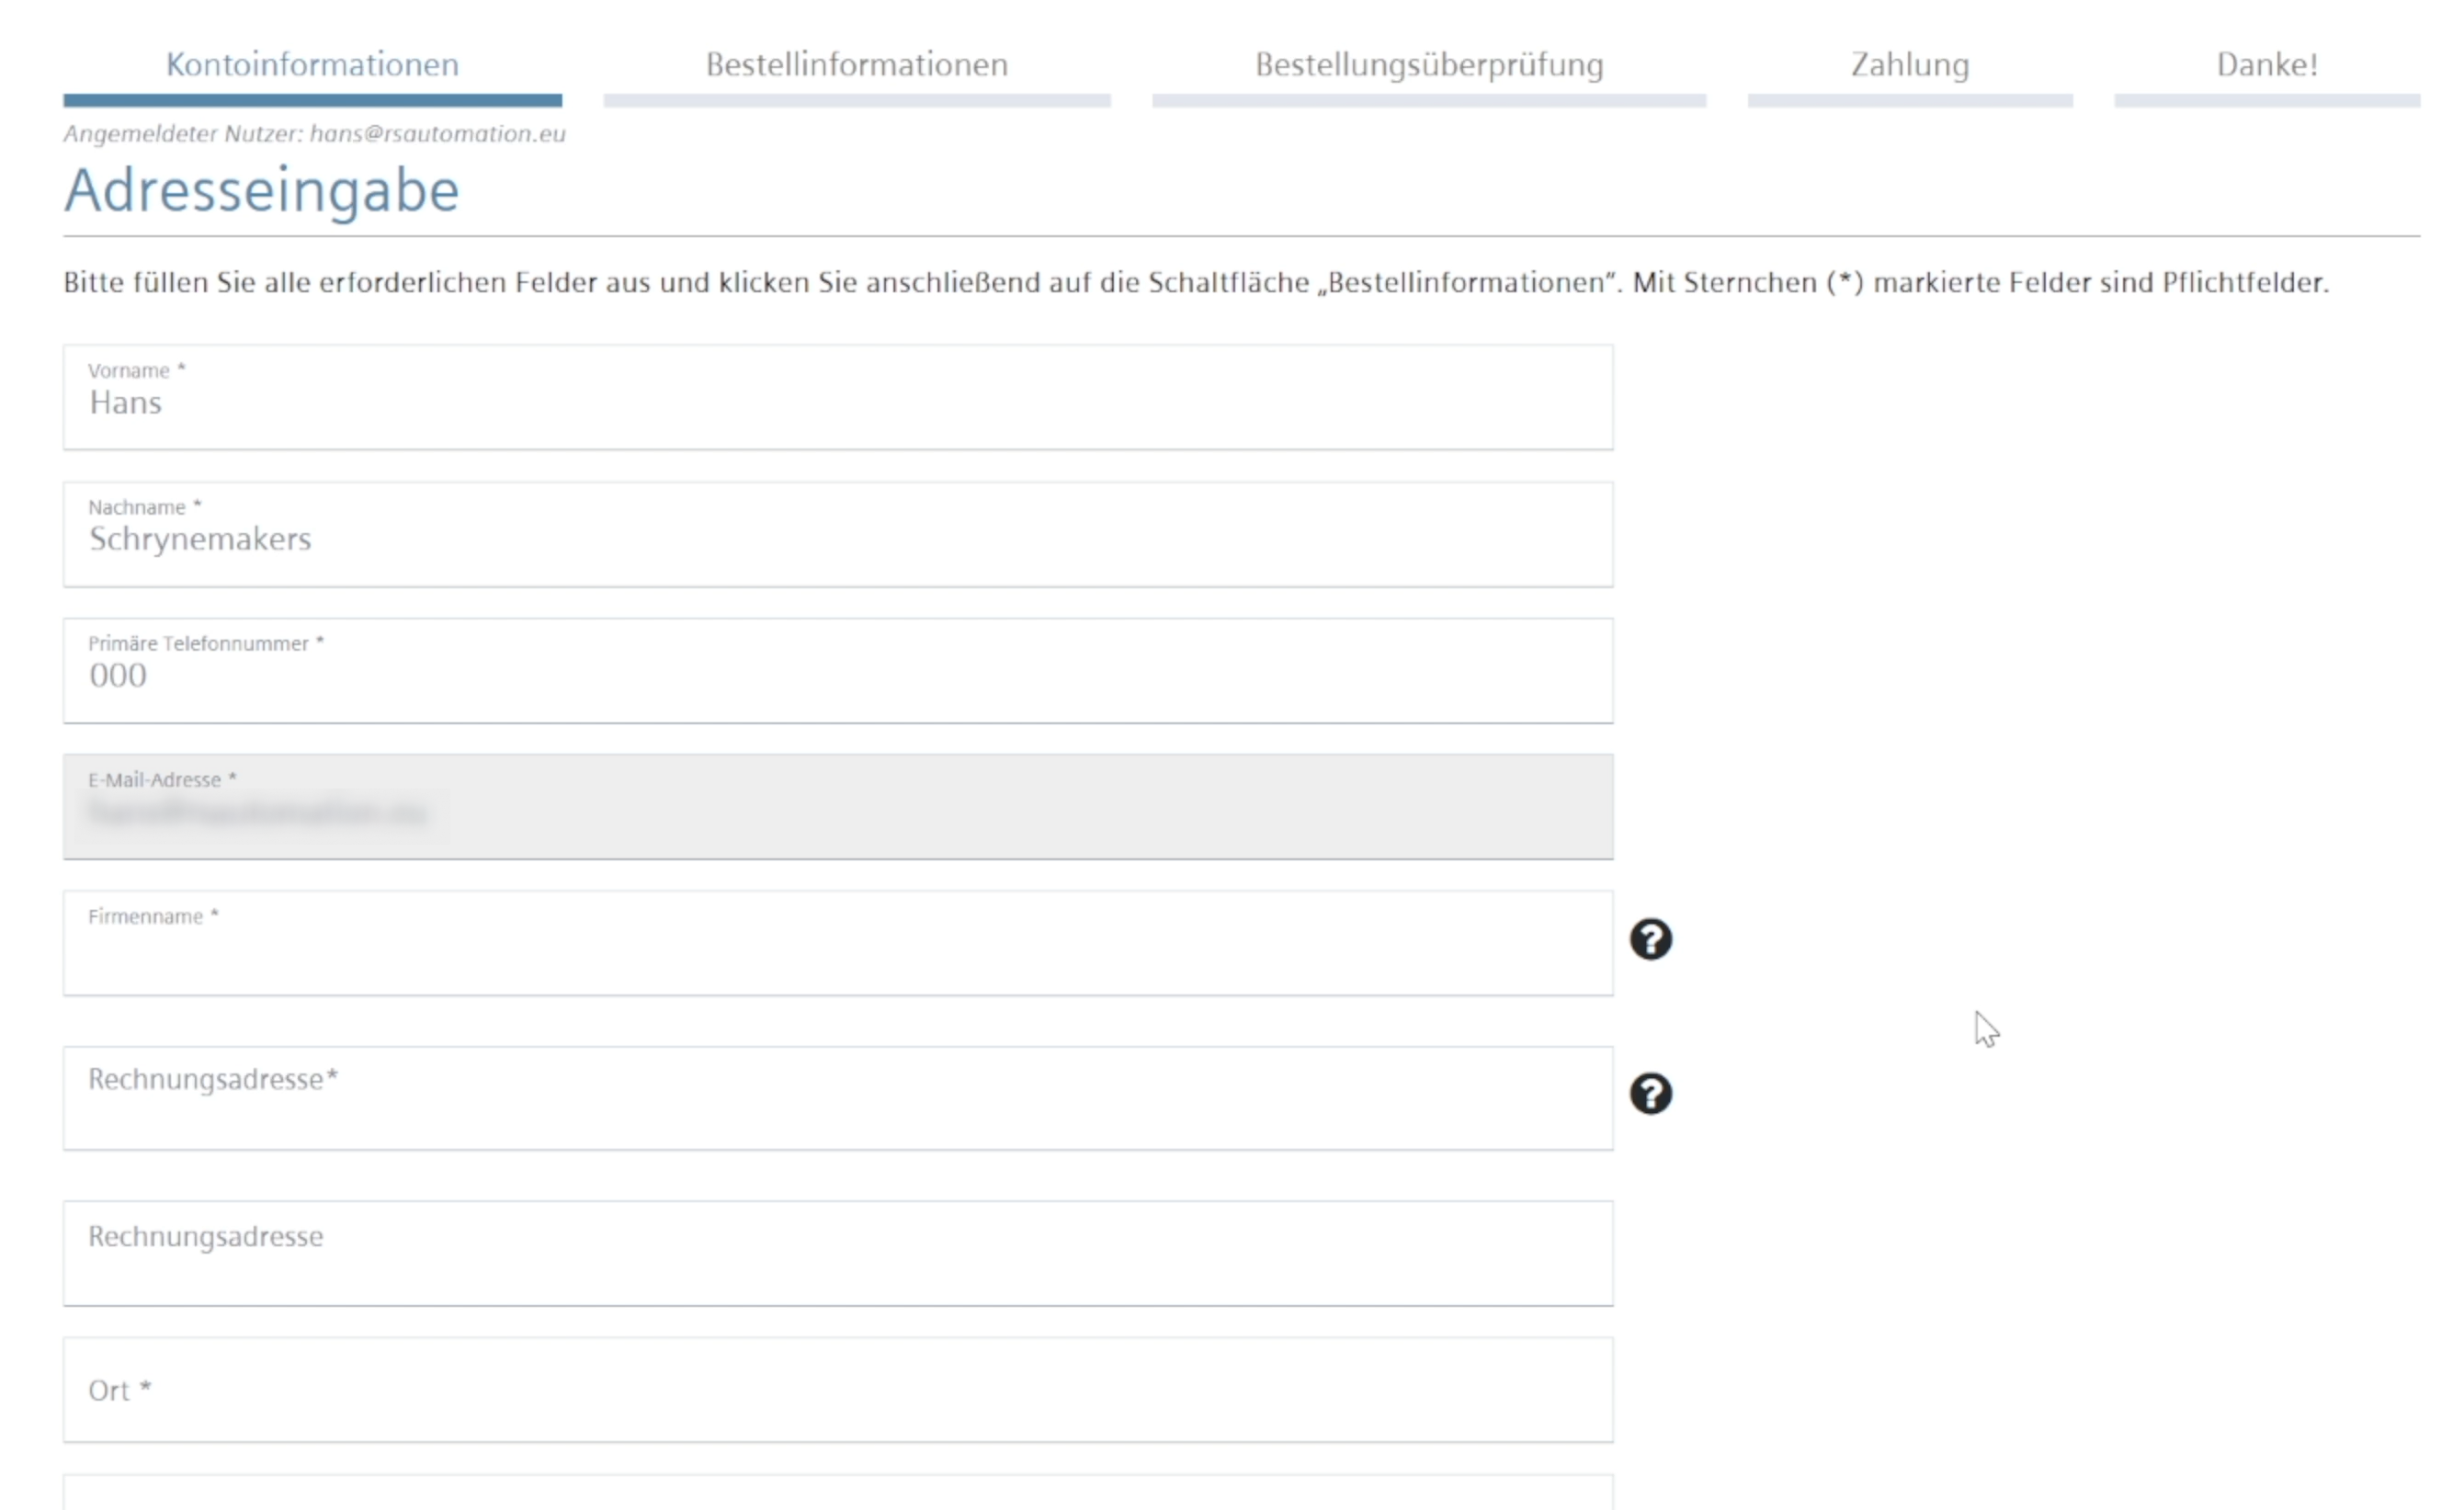
I'm self-employed, so I simply entered my own company details. If you're signing up as a private individual, you'll need to check which information Siemens accepts for your situation. During my registration, the VAT number field appeared to be required, so make sure you enter the appropriate information according to your country's requirements.
Once you've entered everything, continue to the next step, which is called "Order Information".
Assigning an account administrator
In the Order Information section, Siemens asks you to assign an administrator to your Industry Organization Account. If you're creating the account for yourself, you can simply assign yourself as the administrator by entering your first name, last name, email address, and country.

At the bottom of the page, you'll find a checkbox confirming that the account will only be used by authorized users. Make sure you select this checkbox before continuing to the next step.
Reviewing and completing your order
The next page shows an overview of your order. In my case, the price was displayed as €0 per year, with automatic yearly renewal until canceled. Scroll down, accept the terms and conditions, and continue to the payment section.

When I registered, Siemens asked me to enter my credit card information, even though the account itself was free. I entered my card details and clicked "Pay". Siemens then verified the card with my bank and displayed a "Payment Successful" message.

After that, Siemens informed me that my order was being processed and that I would receive an email once everything had been completed. So the next step is to open your inbox and look for the confirmation message from Siemens.
This email should confirm your Industry Organization Account purchase and include a link to "My Account", where you can manage your subscriptions.
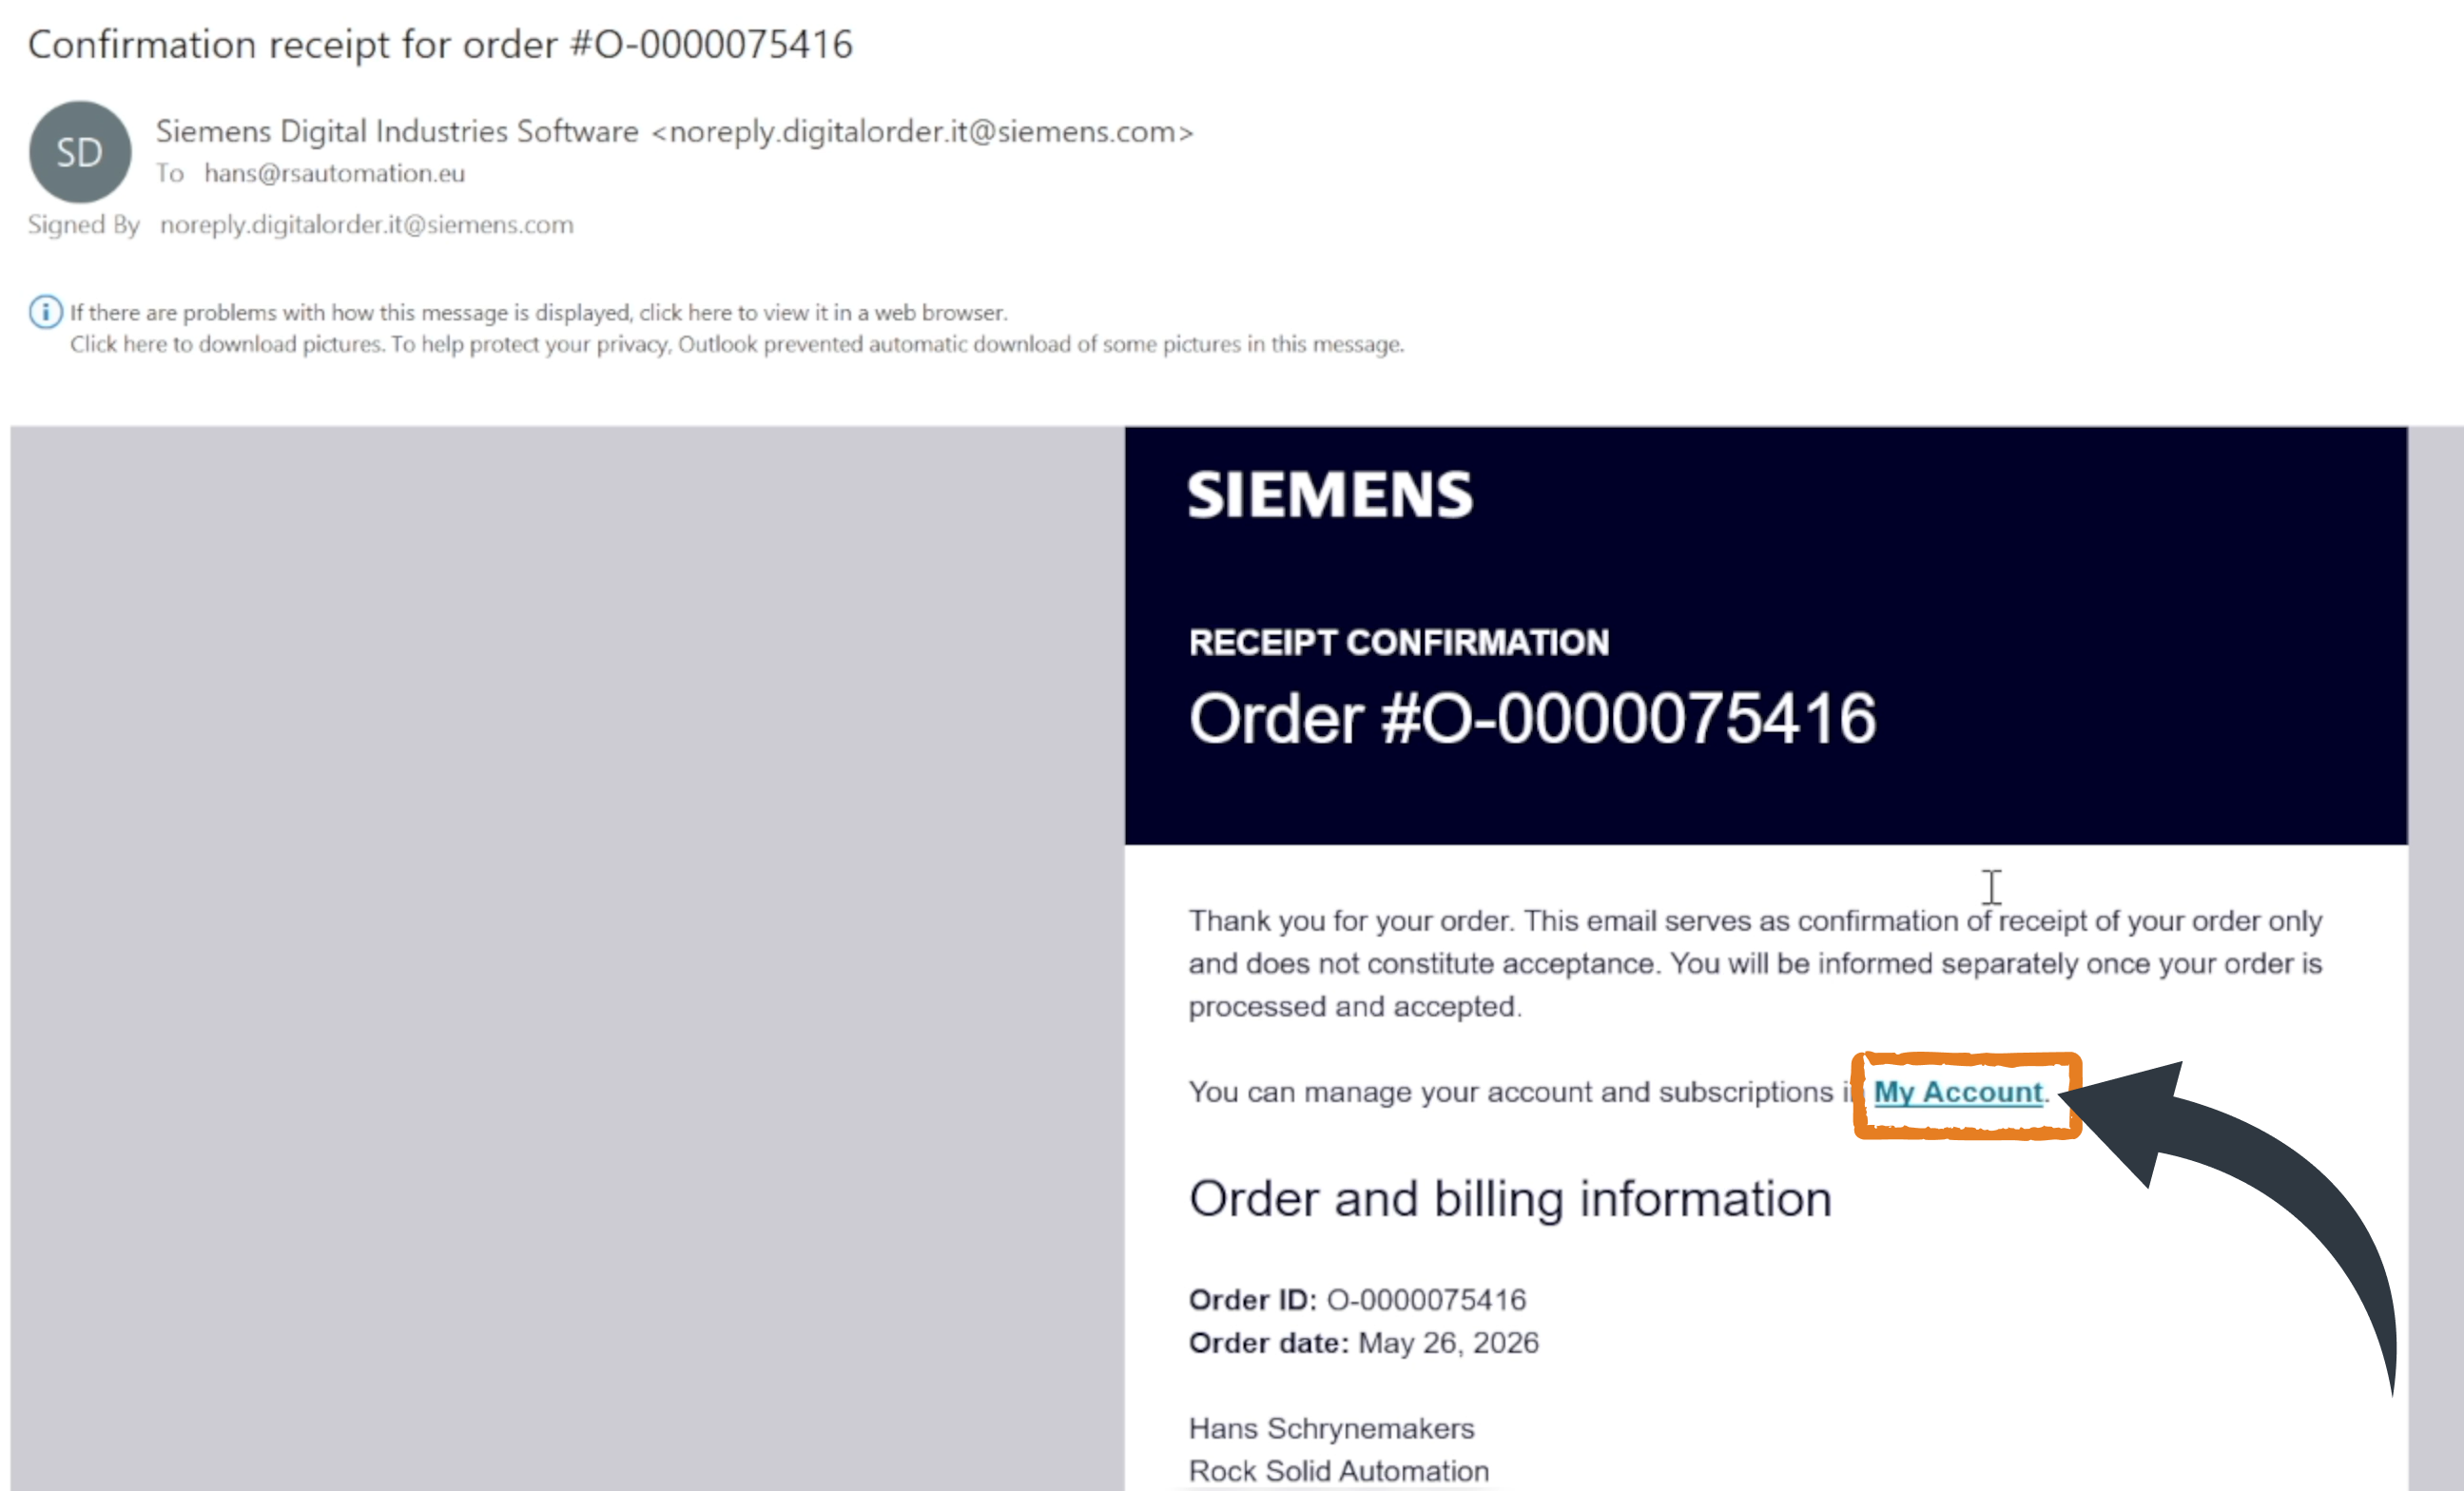
Remember this link, because we'll need it again later when we want to cancel the Eigen Engineering Agent trial.
And there we go! We finally have our Industry Organization Account. Now we can move on to what we actually wanted to do in the first place: sign up for the free trial.
3 - Signing Up for the Eigen Engineering Agent Free Trial
Now that we've created the required Industry Organization Account, we can finally continue with the Eigen Engineering Agent free trial.
Go back to the Siemens Dex page for the Eigen Engineering Agent and click "Try 1 month free". Once again, make sure you read the subscription conditions carefully, especially the part explaining that the free trial automatically becomes a paid subscription unless you cancel it in time.
Click "Add to Cart", and a popup should confirm that the free trial has been added to your shopping cart for $0. From here, click "View Cart" to continue.

Selecting the payment method
Now you'll need to select your payment type again. And this is where I ran into another problem during my own registration.
Initially, I selected "Credit Card/PayPal", which seemed like the most logical choice. Everything appeared to work correctly, and I was able to complete all the registration steps. But at the very end, when Siemens checked the payment, the process failed. I kept receiving a "Payment failed" message, which meant I couldn't complete the registration or get access to the software.
After exchanging a few emails with Siemens, they suggested trying a different payment method: "Payment on Account".
And that worked!
So based on my experience, I recommend selecting "Payment on Account" when signing up for the free trial, provided this option is available to you. This doesn't necessarily mean that Credit Card/PayPal won't work, but it might save you from running into the same issue I experienced.
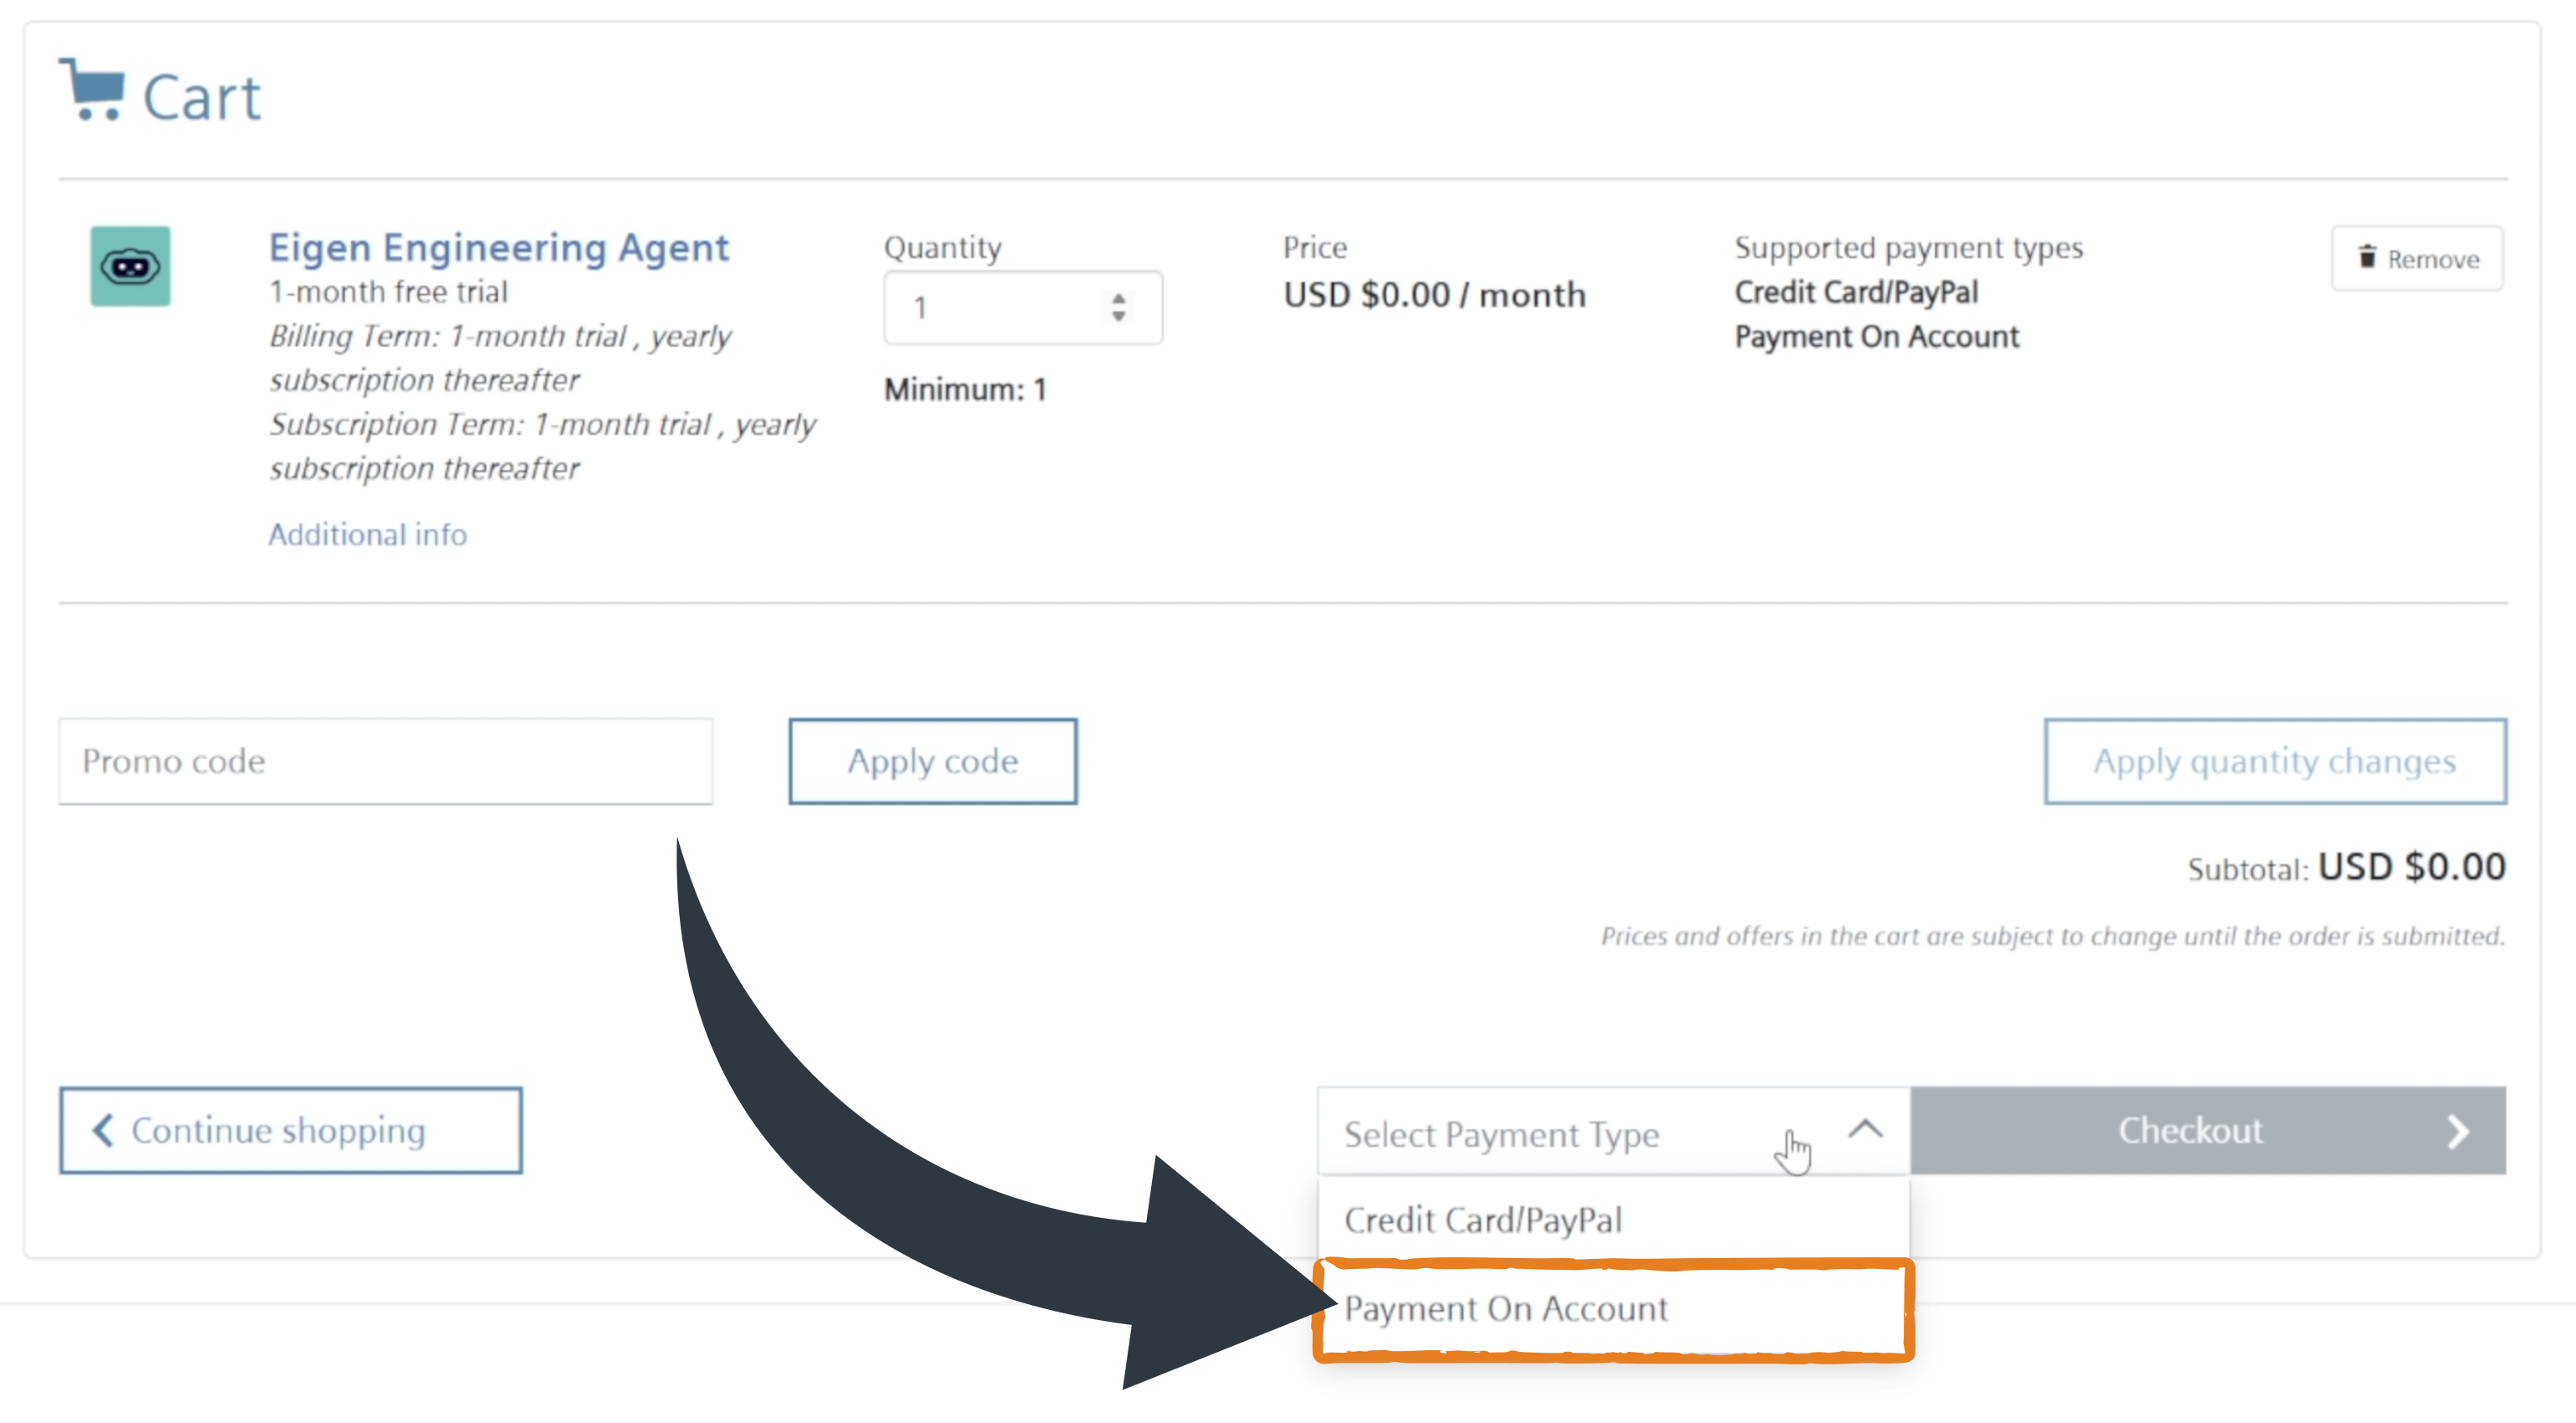
After selecting the payment method, click "Checkout" to continue.
Logging in and completing your registration
Siemens will now ask you to log in using your Siemens ID. If you don't have one yet, you'll need to create one first. Depending on the available options, you might also be able to sign in using Google or LinkedIn.
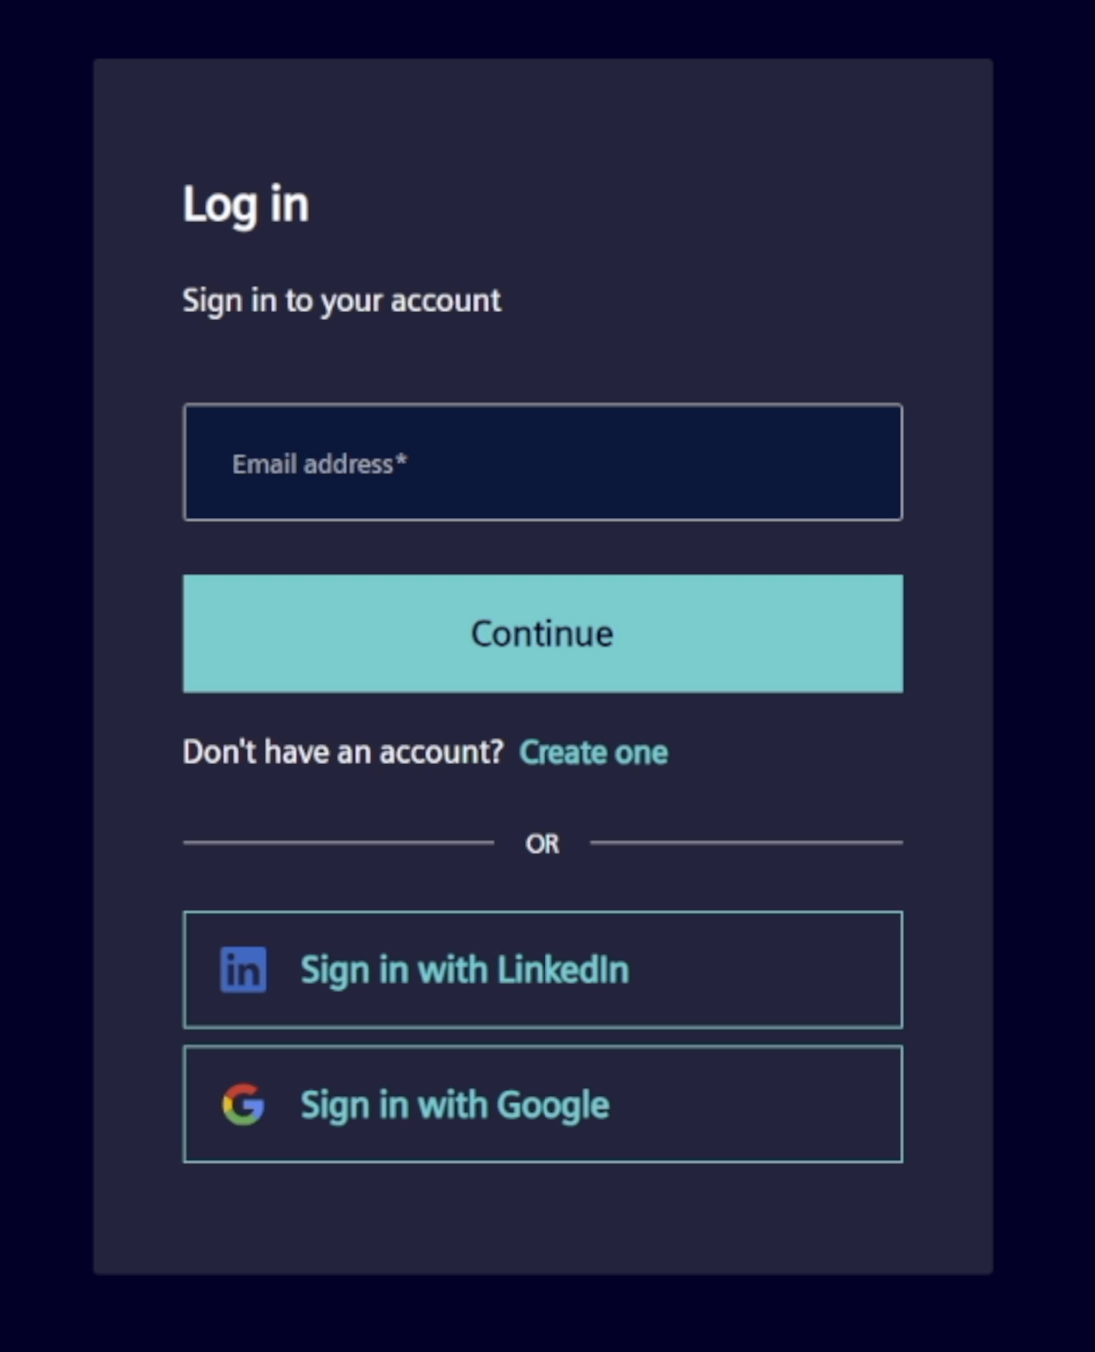
After logging in, Siemens might once again change the website language and currency depending on your location. In my case, it switched back to German and euros, which also meant I had to select "Payment on Account" again before continuing.
Next, you'll find yourself going through a familiar registration process. Remember those steps we went through when creating the Industry Organization Account? Well, here they are again. Luckily, Siemens should remember most of the information you previously entered, so you mainly need to check that everything is correct and fill in anything that's missing.
Once you've verified your personal information, continue to "Order Information". This is where Siemens asks you to select your Industry Organization Account, as shown in the screenshot below.
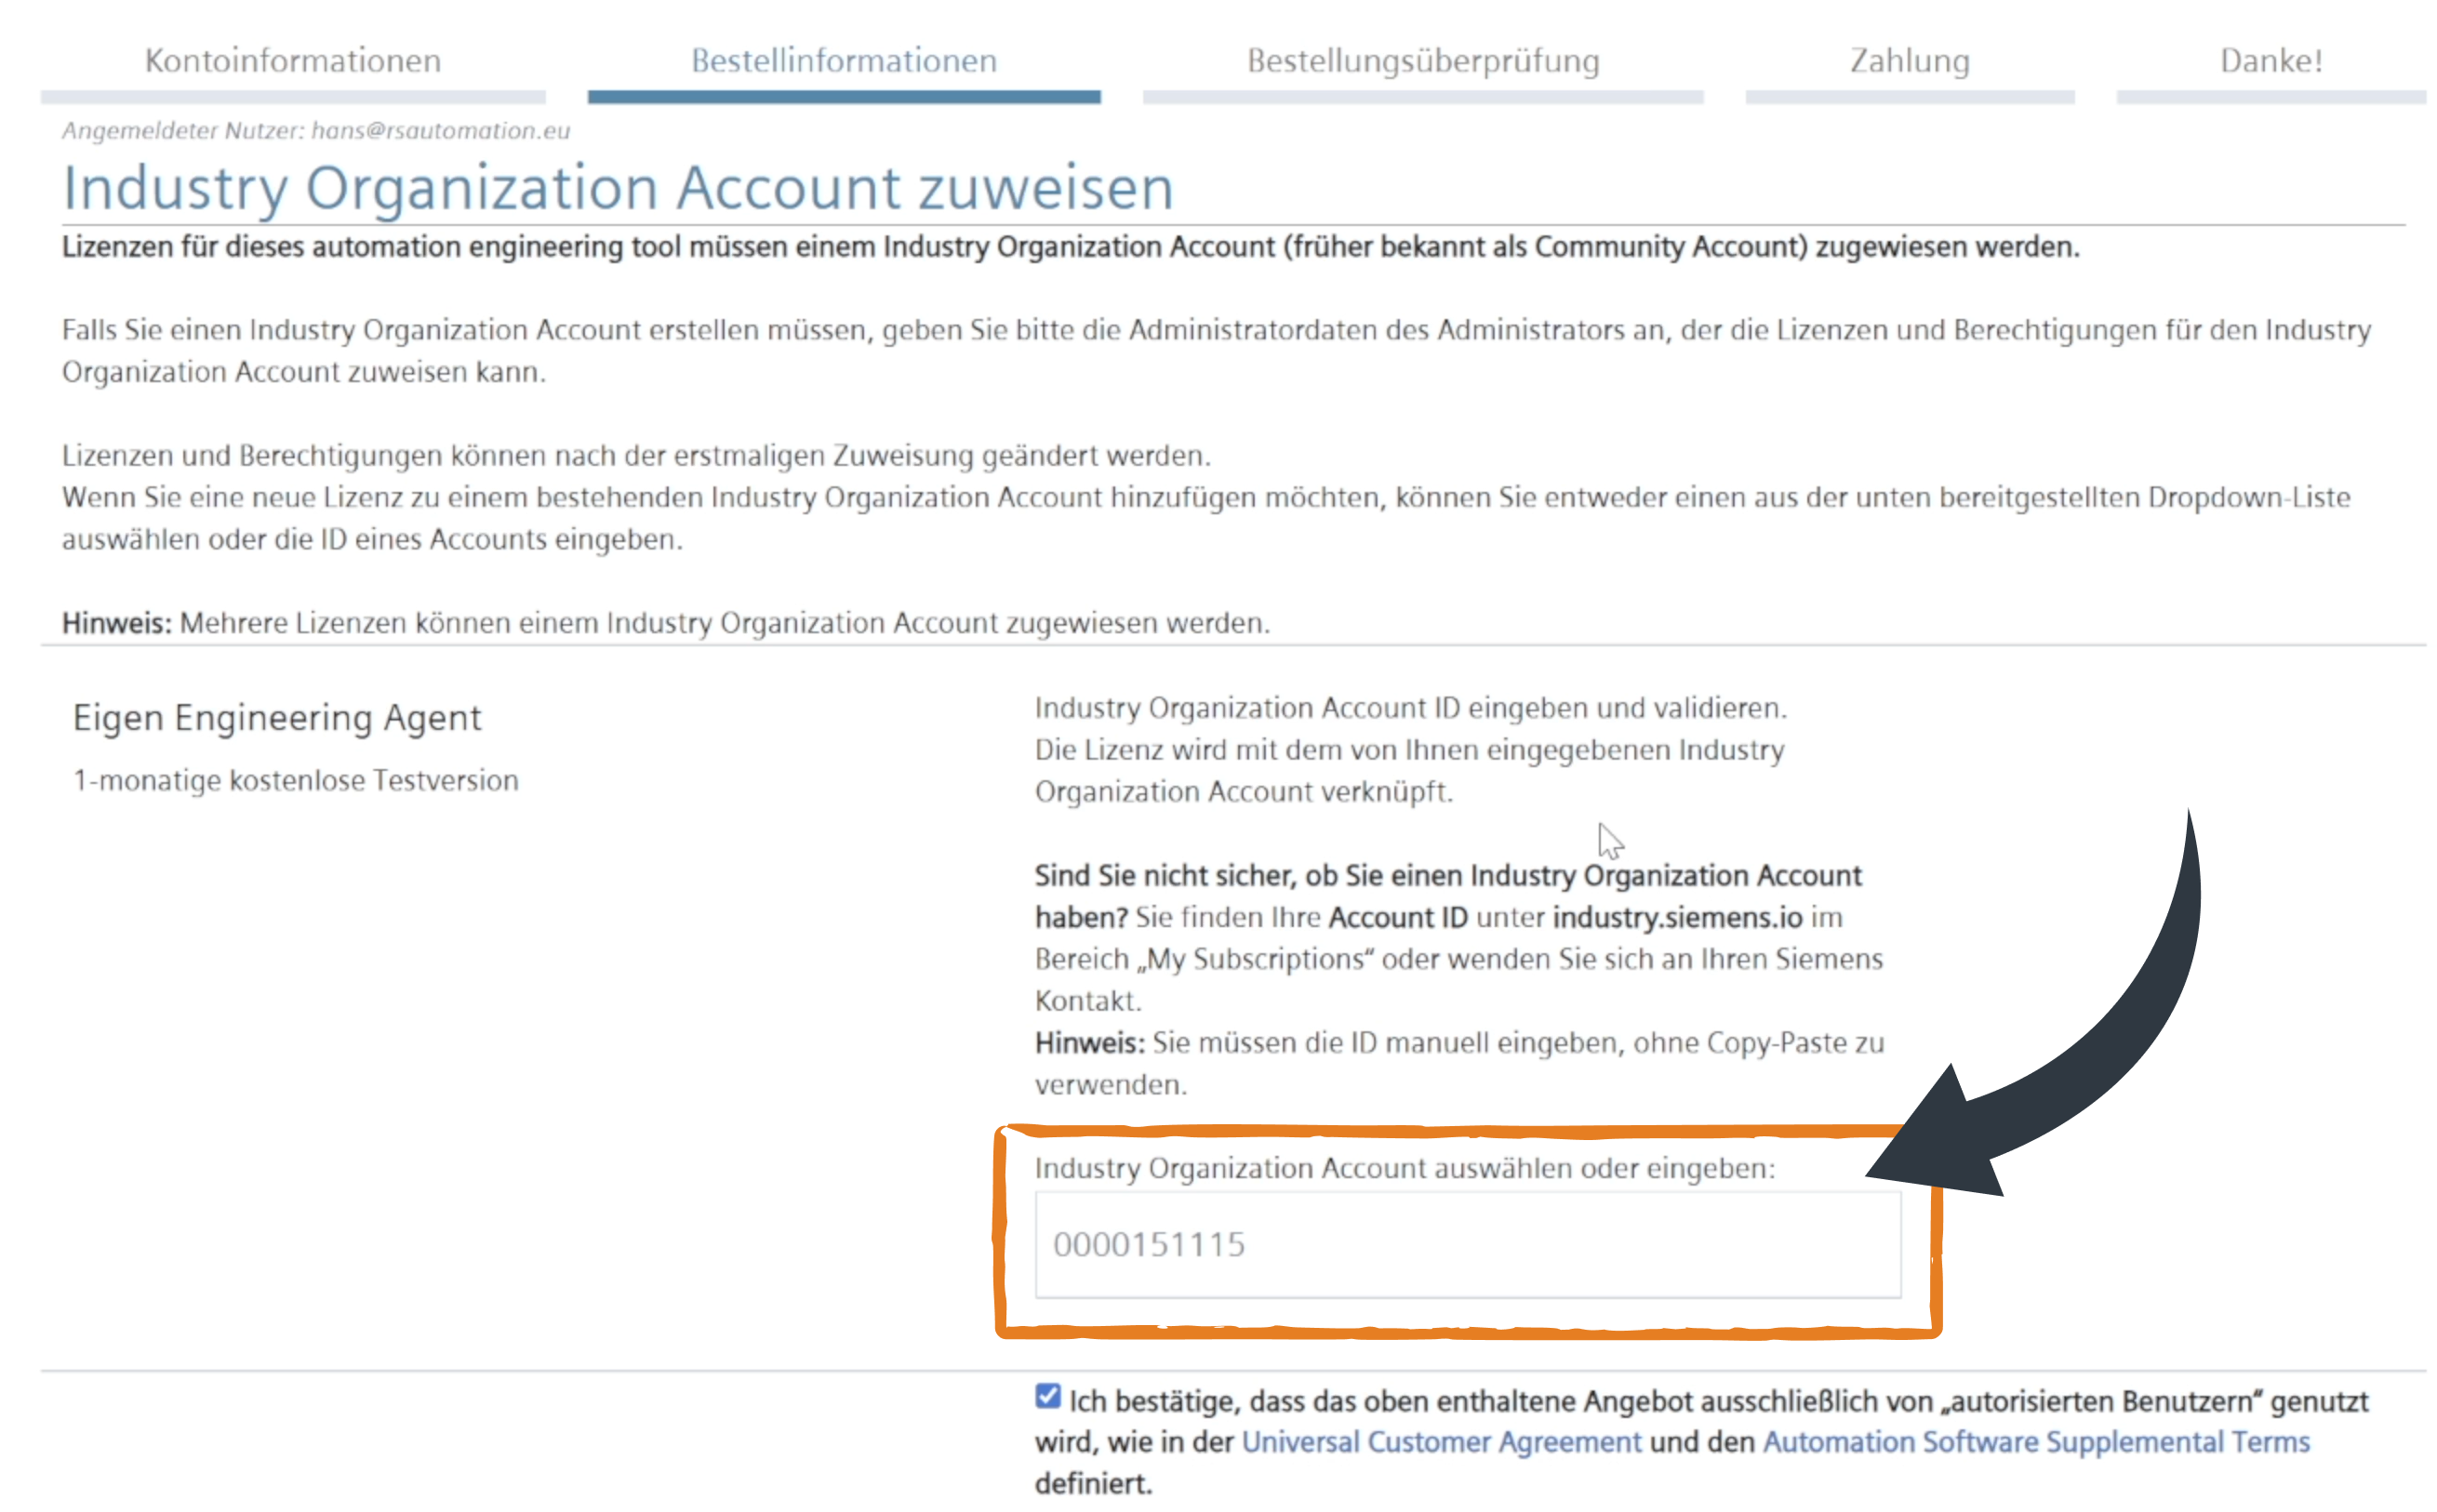
And this is exactly where I got stuck during my first attempt. Because I hadn't created the account beforehand, I couldn't continue. But since we've already taken care of that in Chapter 2, we can simply select our account and move on.
Make sure you also select the checkbox confirming that the Eigen Engineering Agent will only be used by authorized users.
Submitting your trial subscription
The next step is to review your order and confirm that everything looks correct. Once you've accepted the terms and conditions, continue to the payment section.
Because we selected "Payment on Account", Siemens asks whether we need an order number. I selected "I don't need an order number", as you can see in the screenshot below.

Click "Submit Order", and Siemens should display a confirmation stating that your order has been submitted to its finance department.

And that's it. Well, almost. Because even though we've completed the registration process, we still don't have a download link.
Waiting for the confirmation emails
After submitting your order, you'll receive a couple of confirmation emails from Siemens. I received two emails shortly after completing the registration. The first confirmed that the order was successful and was being processed, while the second explained that I had selected Purchase on Account and that the Siemens finance team was reviewing my information.
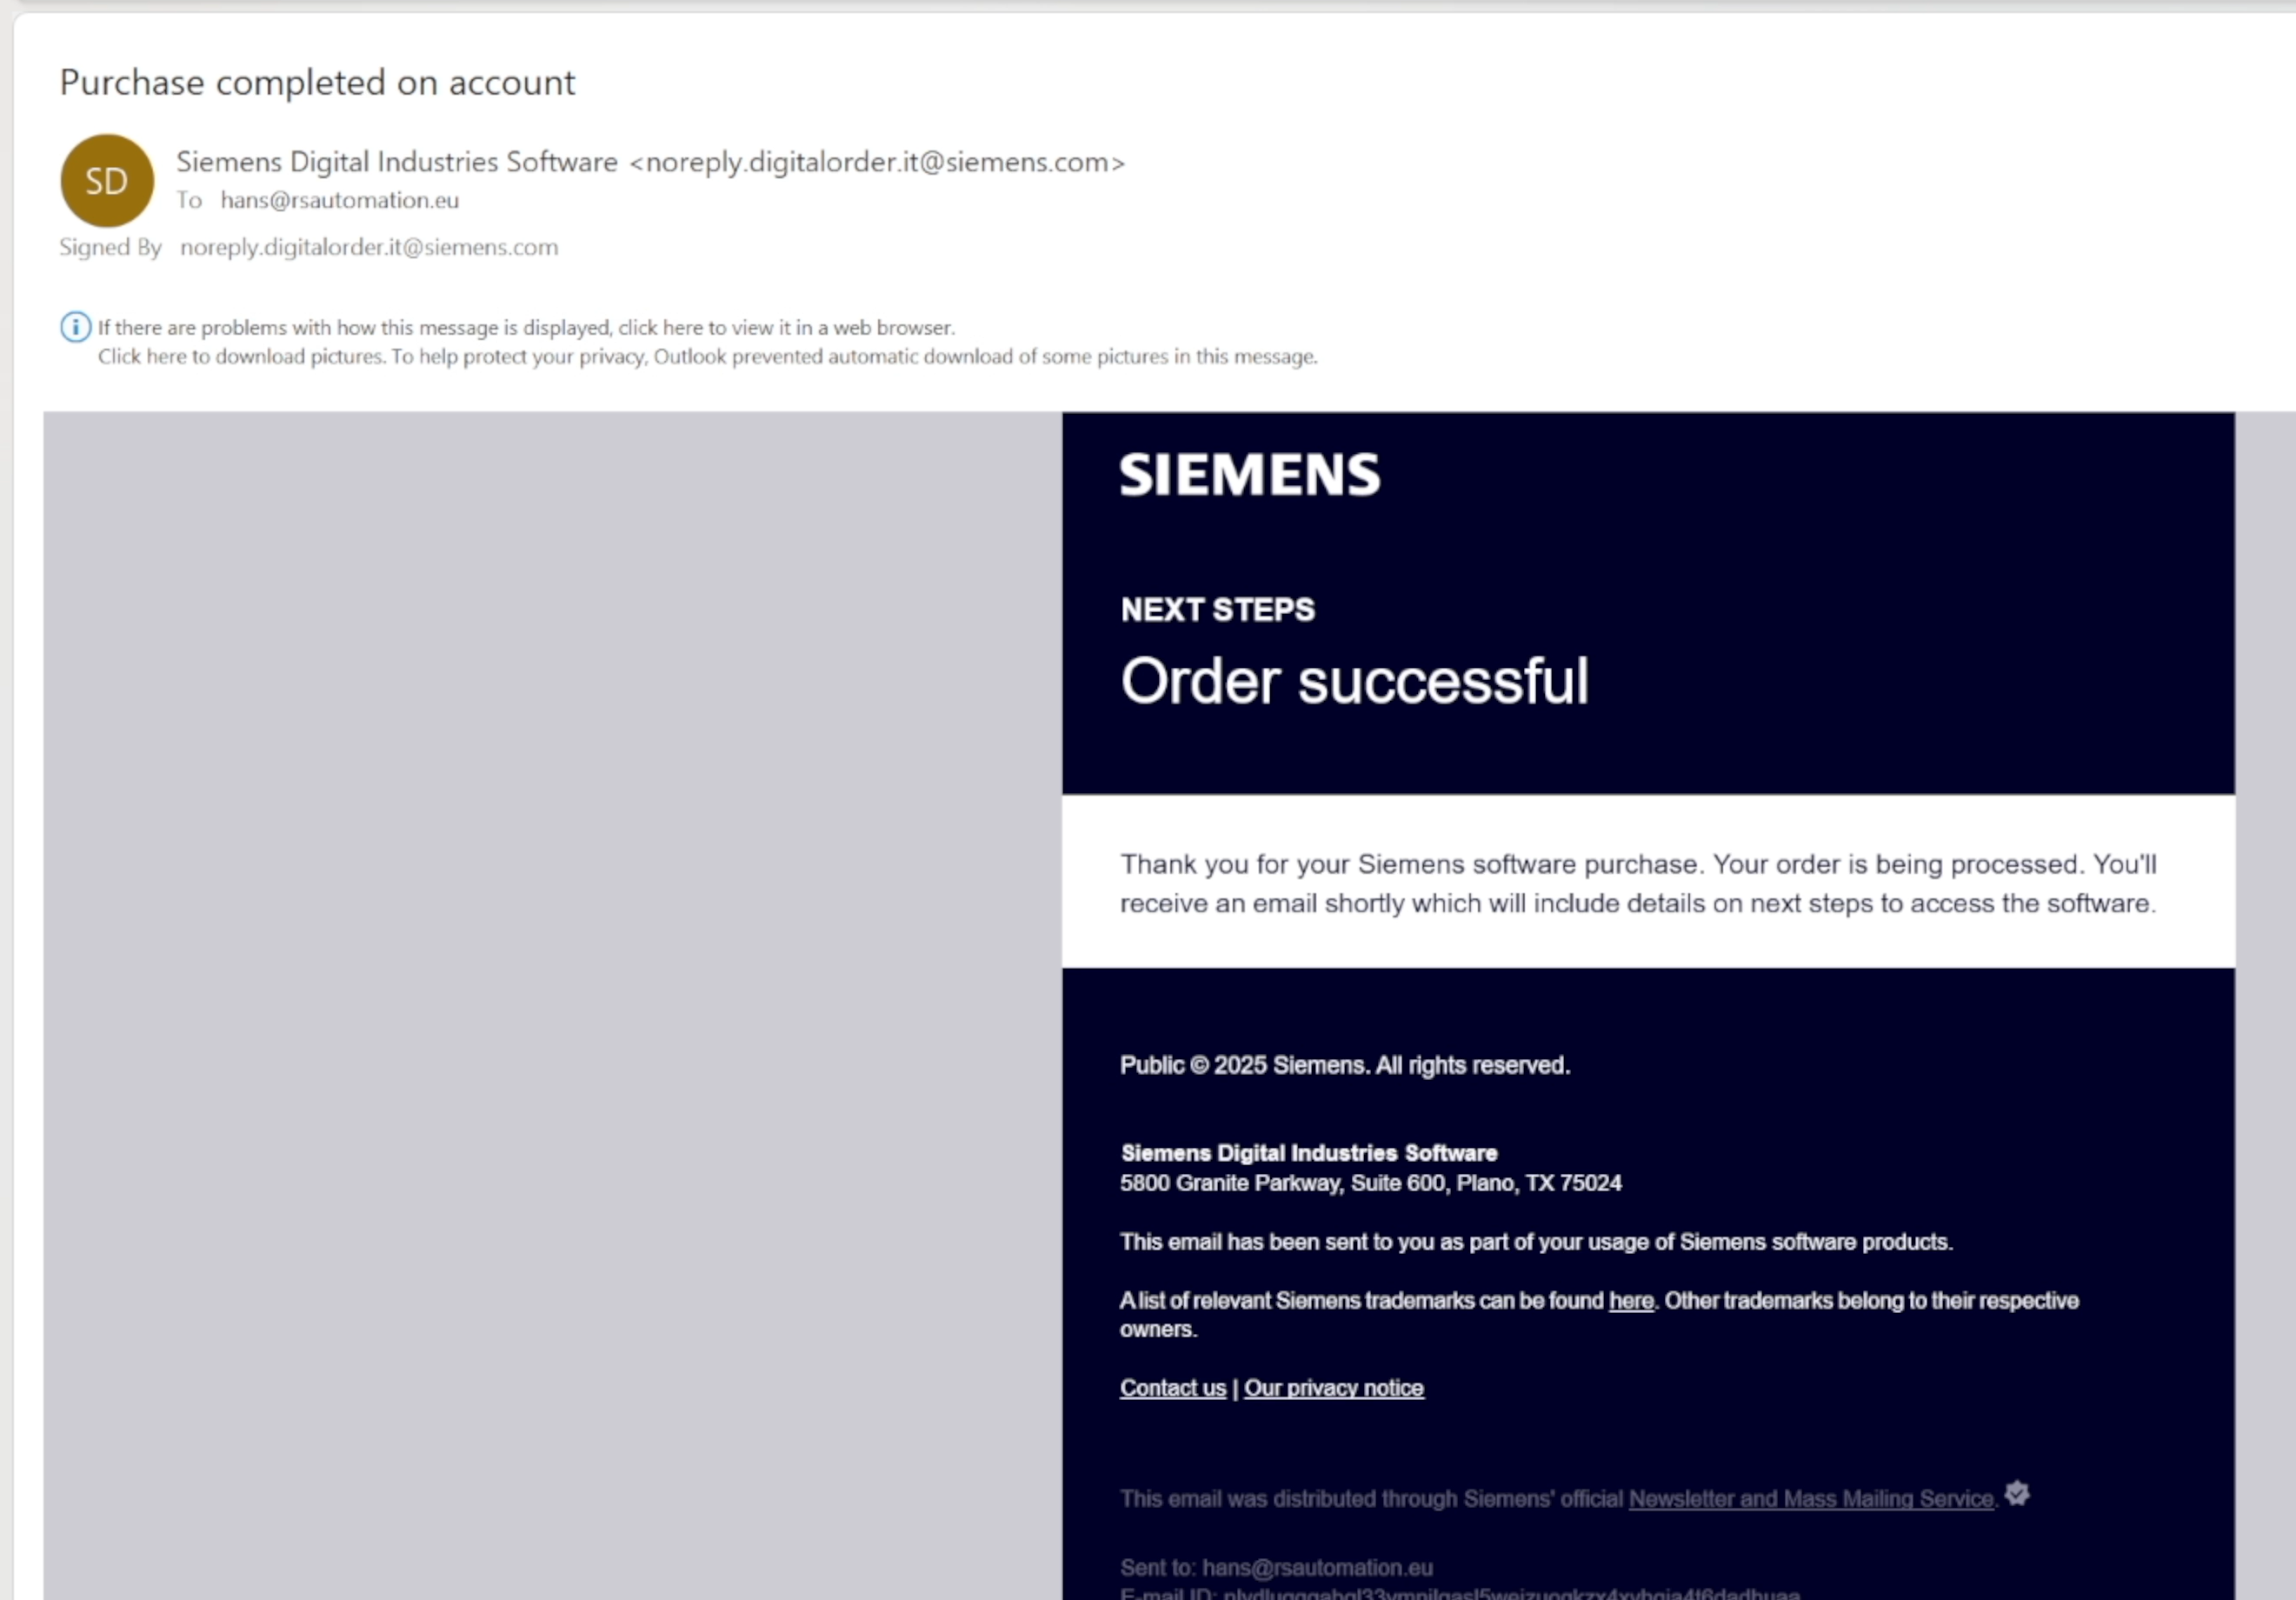
At this point, there's nothing more to do except wait for Siemens to finish processing the subscription. For me personally, this took approximately two days.
After those two days, I received two more emails. The first confirmed that I had been assigned as the Subscription Manager for the Eigen Engineering Agent and included a link to manage the subscription. But still no download link.
The second email was the one I had been waiting for. It welcomed me to the Eigen Engineering Agent, confirmed that a seat had been assigned to me, and finally included the download link.
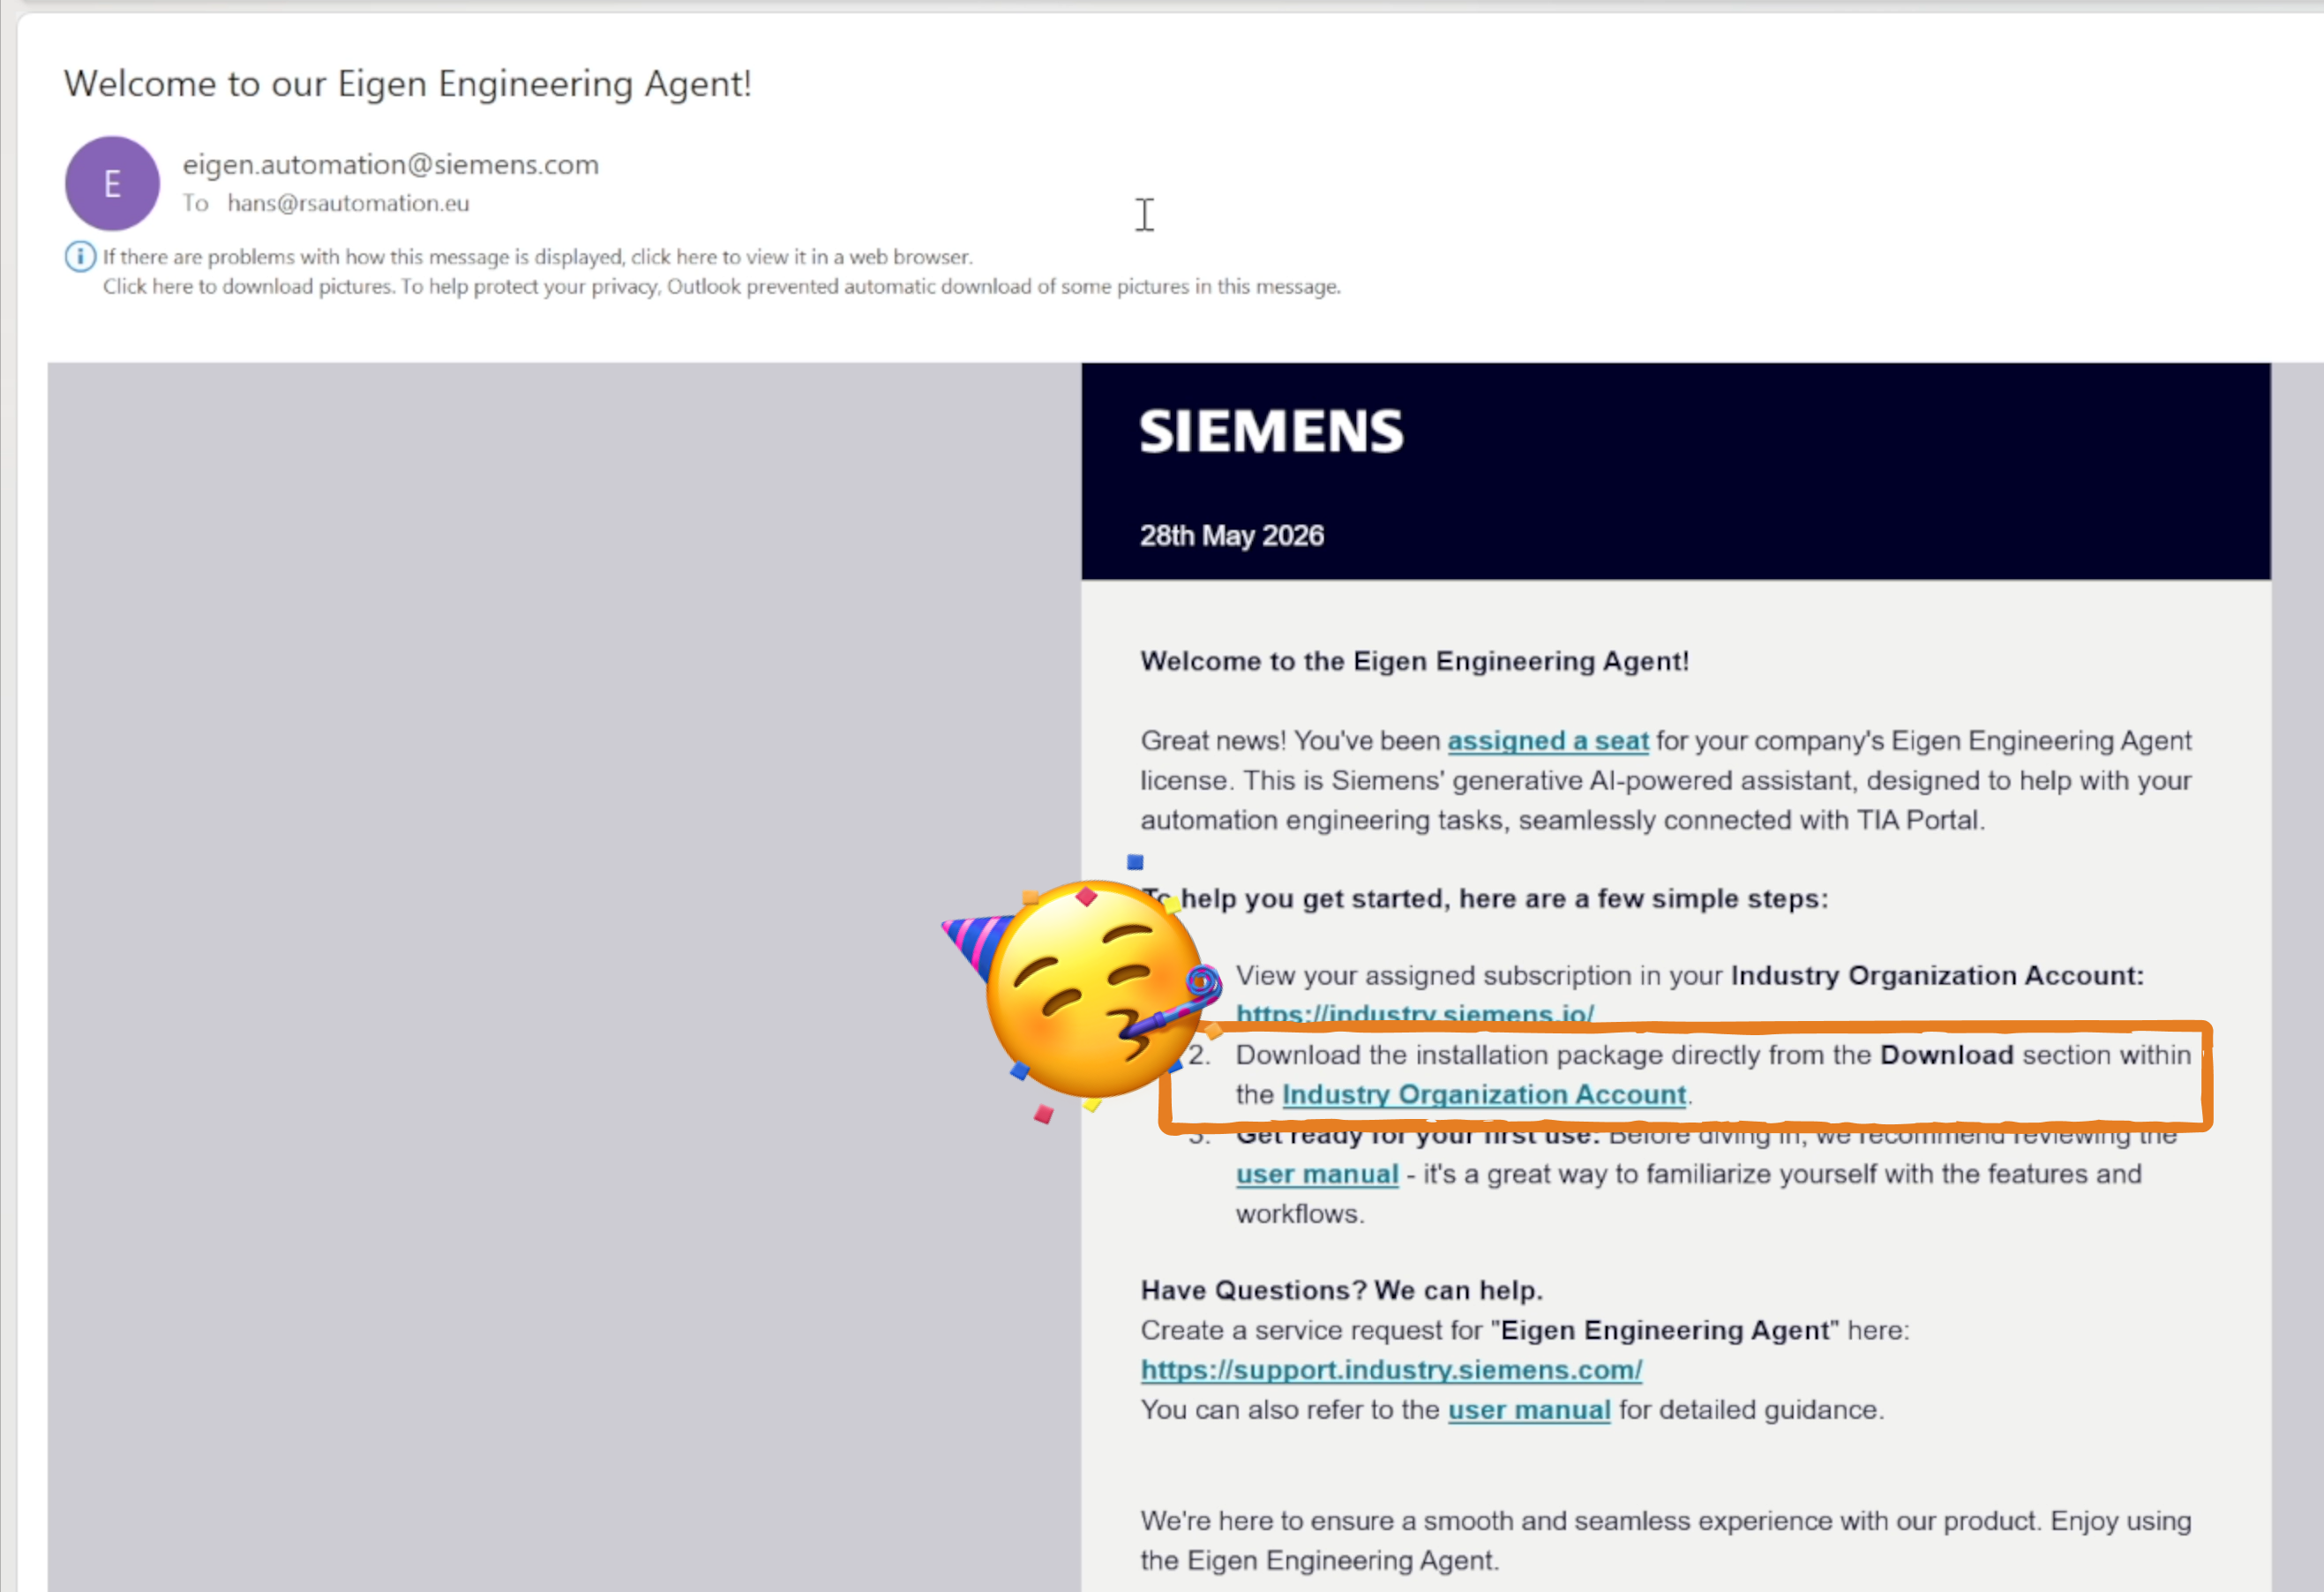
Finally! After creating multiple accounts, selecting payment methods, completing checkout forms, and waiting for confirmation emails, we can actually download the software.
4 - Downloading the Siemens Eigen Engineering Agent
Open the welcome email from Siemens and click the download link. This takes you to the Siemens download portal, where you'll probably need to log in with your Siemens ID again. If you've enabled two-factor authentication, you may also need to enter a code from your Authenticator app.
After logging in, accept the necessary terms and conditions. You might also need to confirm the cookie settings before you can access the Agent page.
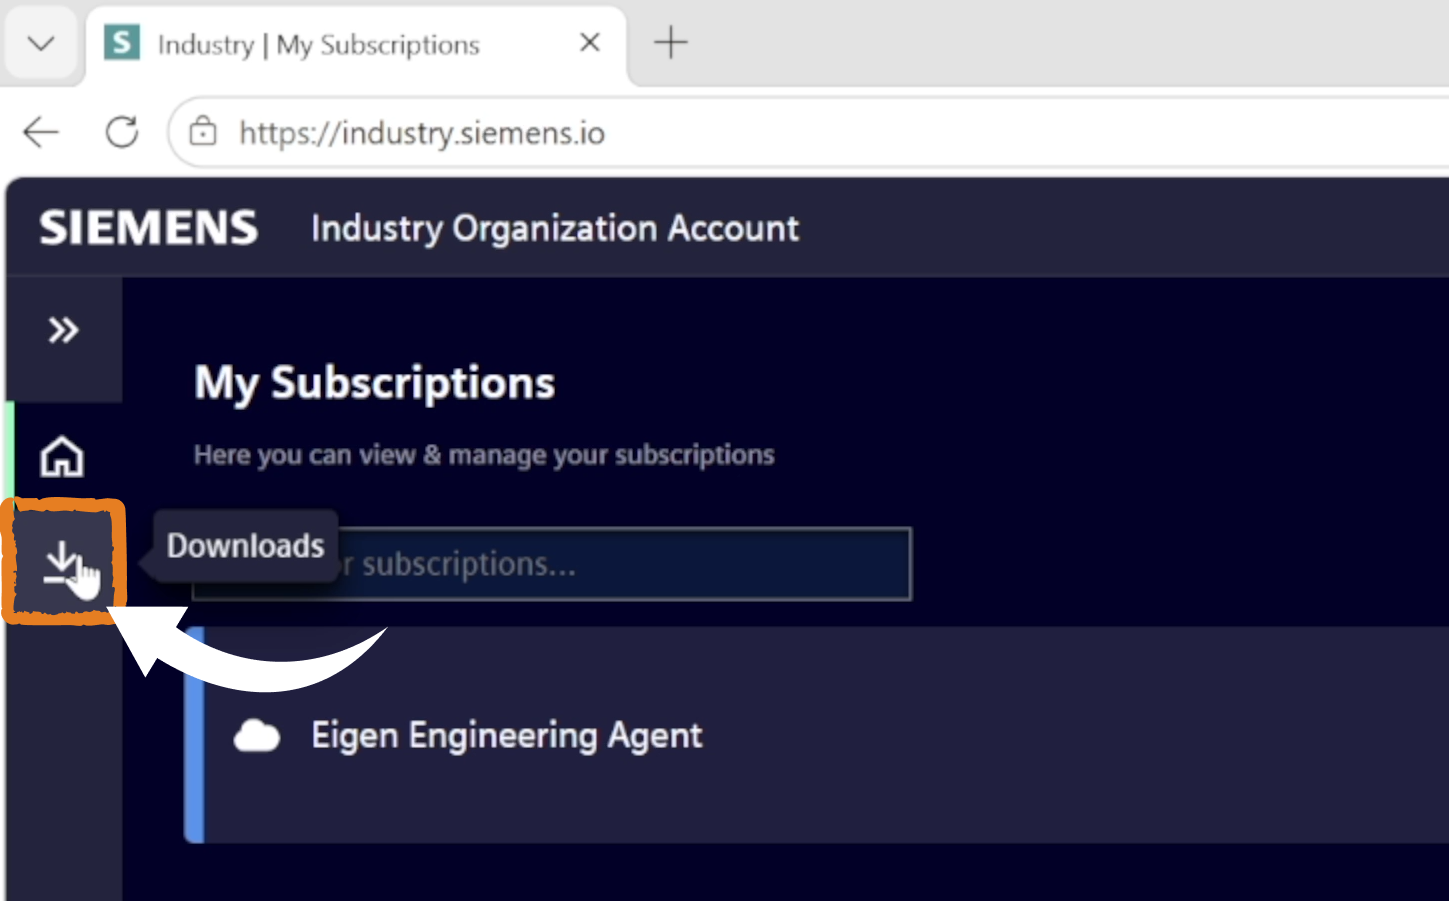
Once you're inside, look for the "Download" tab on the left side, as shown in the screenshot below.
Selecting your hosting region
On the download page, Siemens provides two options: an EU-hosted version and a US-hosted version of the Eigen Engineering Agent.
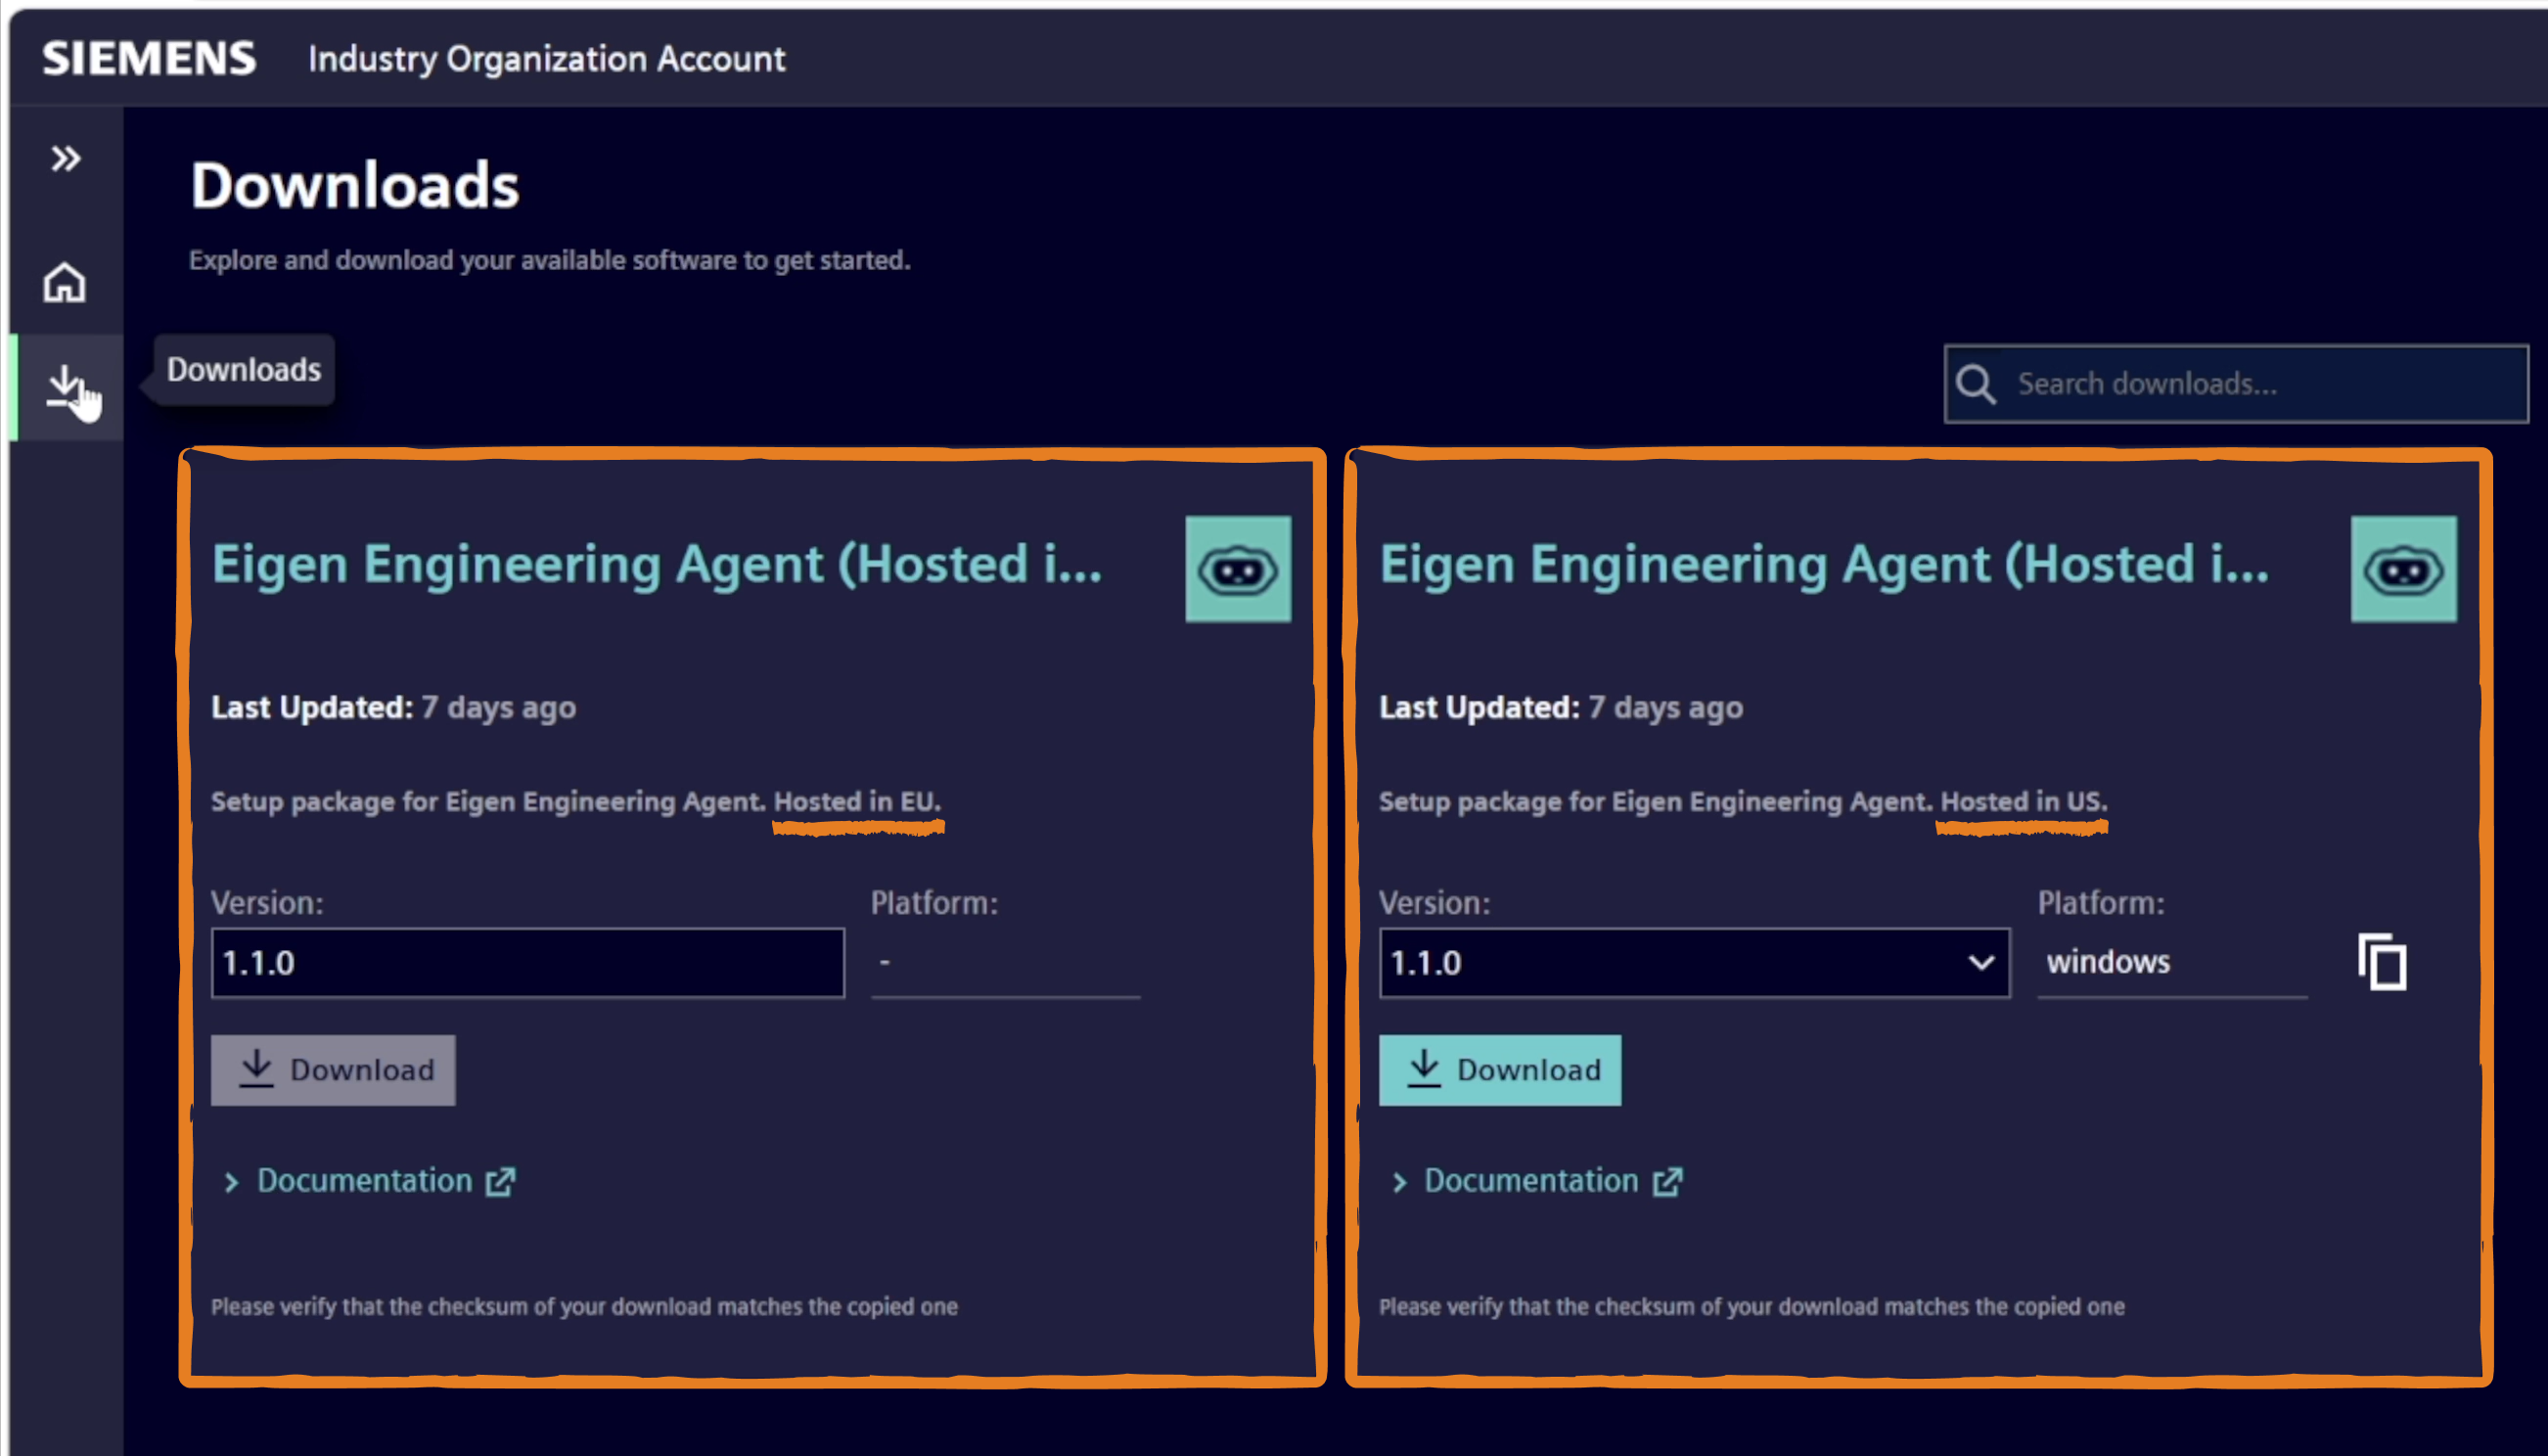
Select the option that makes the most sense for your location and requirements. For example, if you're located in Europe, the EU-hosted version will probably be the most logical choice. If you're based in the United States, the US-hosted version might make more sense.
The hosting selection may also be relevant to your organization's data-location requirements, so keep that in mind when choosing between the two options.
Selecting the software version
Further down the page, you'll find a version selection. I recommend selecting the latest available version, unless you have a specific reason to use an older one.

Keep in mind that Siemens may have released newer versions since I wrote this guide, so the version numbers in your download portal might be different from those shown in my screenshots.
Once you've selected the hosting region and software version, click "Download". The setup file will now be downloaded to your computer, most likely into your Windows Downloads folder.
In my case, the file was approximately 134 MB, which was quite a relief compared to downloading TIA Portal, where installation packages can easily reach several gigabytes.
Before moving on to the installation, there's one more thing worth mentioning. The Siemens download portal also includes a link to the official Getting Started documentation, which I recommend opening and having a quick look through.
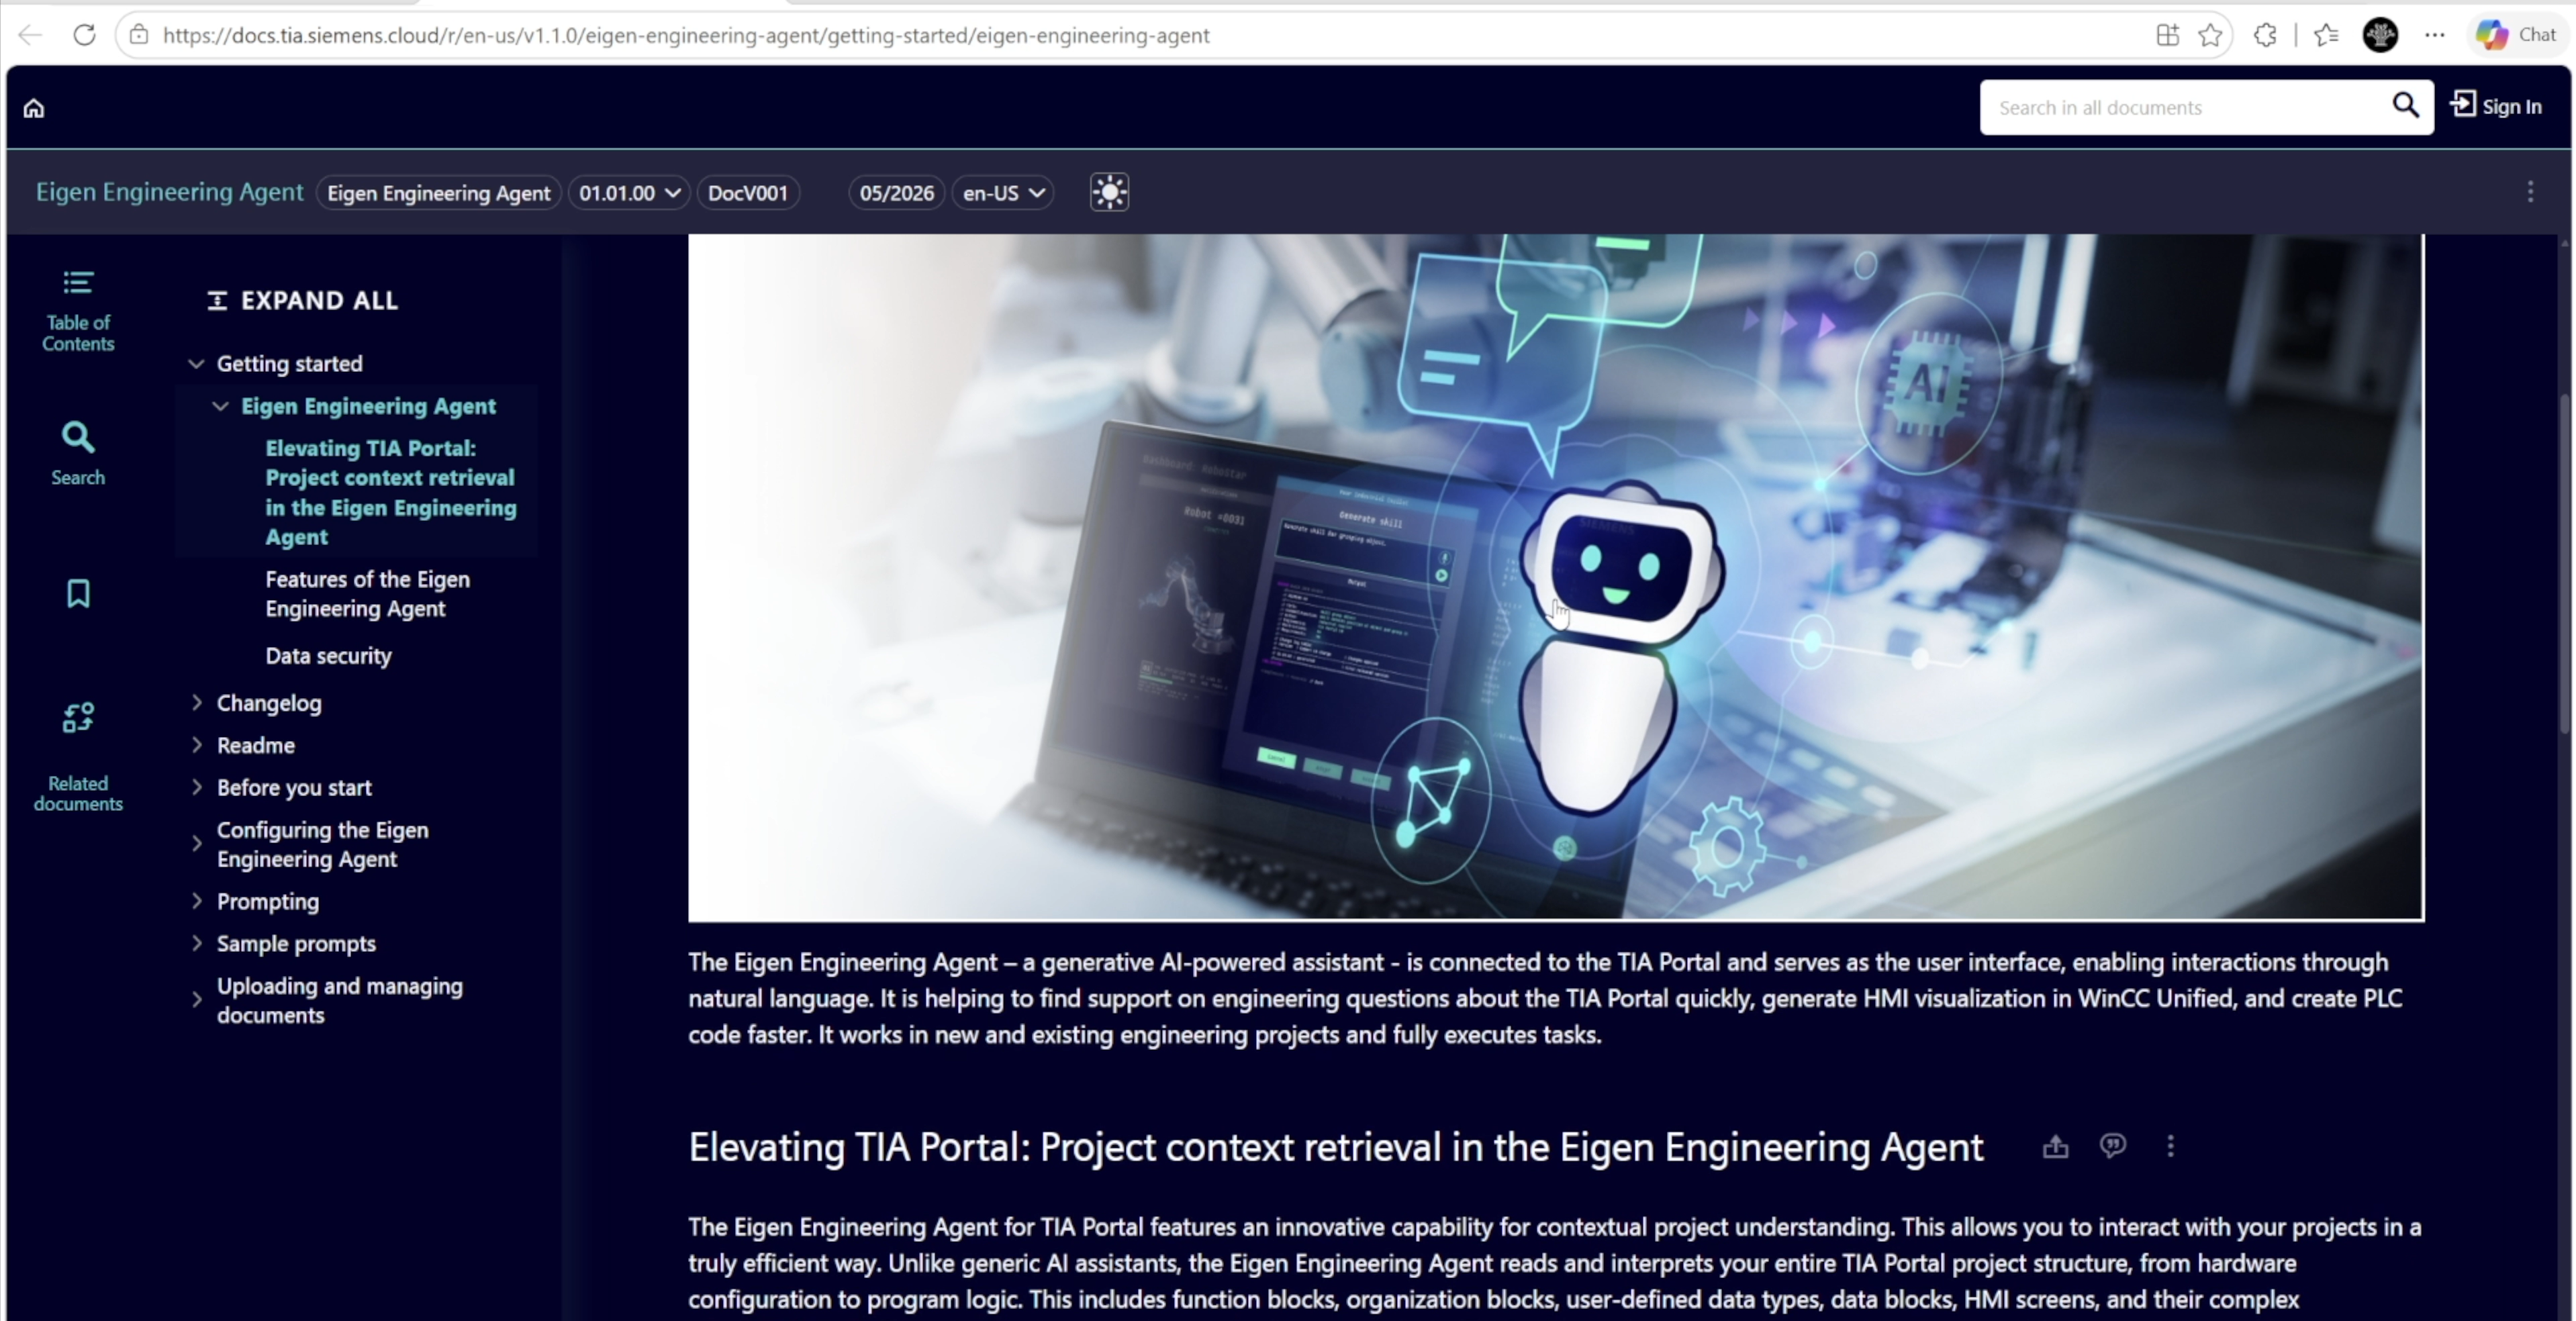
The guide is relatively short and provides useful information about getting started with the Agent. It's worth spending a few minutes reading through it before you begin experimenting with the software.
Now that we have the setup file, we can finally move on to the installation.
5 - Installing and Starting the Eigen Engineering Agent
The installation itself is actually one of the easiest parts of the entire process. But there is one important thing to consider before you begin.
Installing the Agent in the correct environment
Make sure you install the Eigen Engineering Agent in the same Windows environment where TIA Portal is installed.
For example, I use virtual machines for my TIA Portal projects. So instead of installing the Agent directly on my main Windows computer, I installed it inside the virtual machine where TIA Portal is running.
If you're running TIA Portal directly on your main Windows system, you should install the Agent there instead. This ensures that the Agent and your TIA Portal installation are available in the same environment.
Running the installer
Go to the folder containing the downloaded setup file and double-click "Install Eigen Engineering Agent" to start the installation.
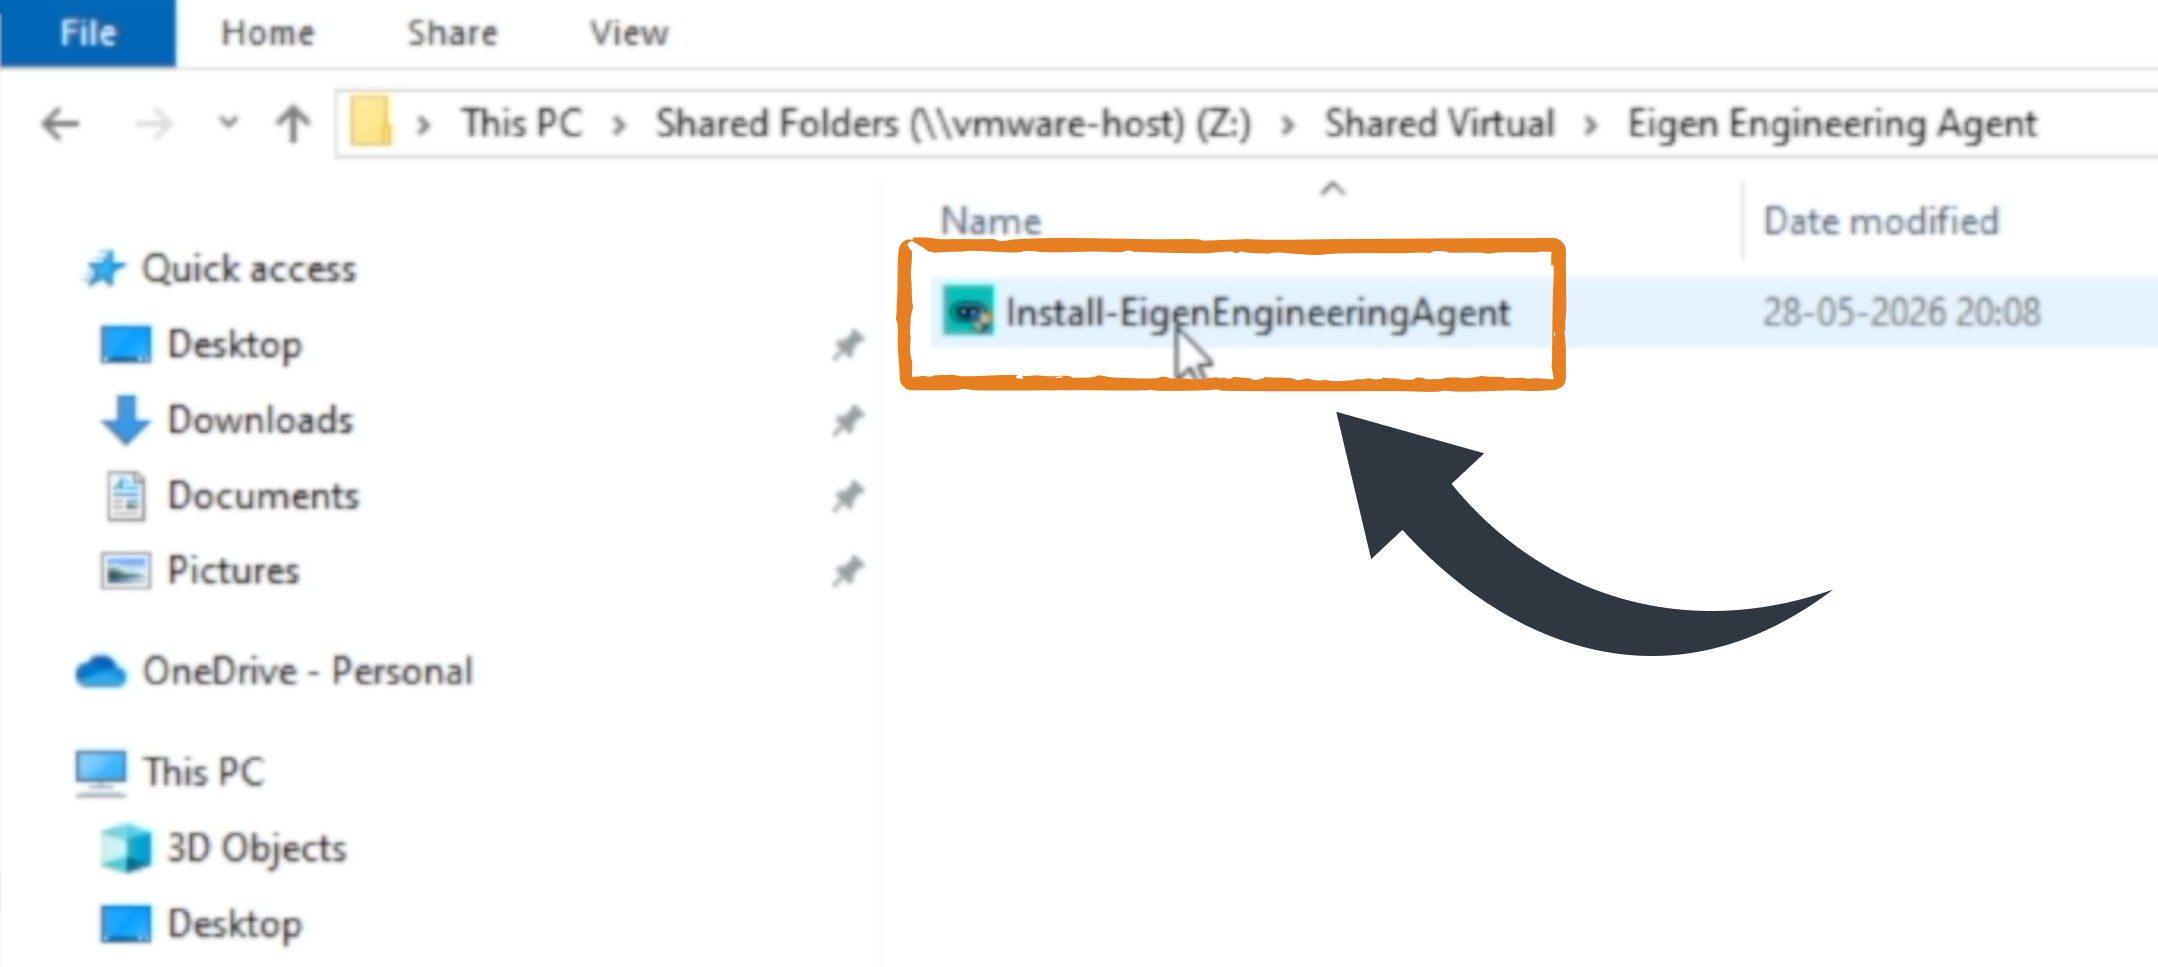
Depending on your Windows environment and user permissions, you might need to run the installer as administrator. In my case, I had to do this because of how my virtual machine was configured, but you might not need to.
Also, make sure you have an active internet connection during installation, because the installer needs to download additional package information.
Once the installation wizard opens, click "Install", and the installer will take care of the rest.

After the installation is complete, you should see the option to launch the Agent immediately.
Logging in to the Eigen Engineering Agent
When you start the Eigen Engineering Agent for the first time, Siemens asks you to log in using your Siemens ID. If two-factor authentication is enabled, you'll also need to enter your verification code.

During my first login, the Agent briefly returned to the login screen before continuing. So if that happens to you, give it a moment to finish the authentication process.
After logging in successfully, you should finally see the Agent's main prompt screen, complete with a friendly Siemens robot face welcoming you with the question "How can I help you today?"

Well, Siemens, you could have helped me by making the sign-up process a little less complicated!
But jokes aside, we've made it. The Eigen Engineering Agent is installed and running, and you can now start exploring the tool to see what it can actually do inside your TIA Portal engineering workflow.
There's just one final thing I want to cover before wrapping up this guide, and it's an important one.
6 - How to Cancel the Eigen Engineering Agent Free Trial
As mentioned earlier, the Siemens Eigen Engineering Agent free trial automatically converts into a paid yearly subscription unless you cancel the automatic renewal in time.
When I registered, Siemens displayed a yearly subscription price of $2,100 after the free trial, which is definitely something you don't want to overlook.
Luckily, canceling the automatic renewal is relatively straightforward once you know where to find the option.
Opening your Siemens subscriptions
Remember the confirmation email you received when creating your Industry Organization Account? That email contains a link to your Siemens account and subscription management page.
Click "My Account" to open the Siemens Dex platform. Depending on your location, the website may appear in a different language. In my case, the interface was displayed in German.
On the left side of the Siemens Dex platform, look for "Subscriptions" and click on it, as shown in the screenshot below.
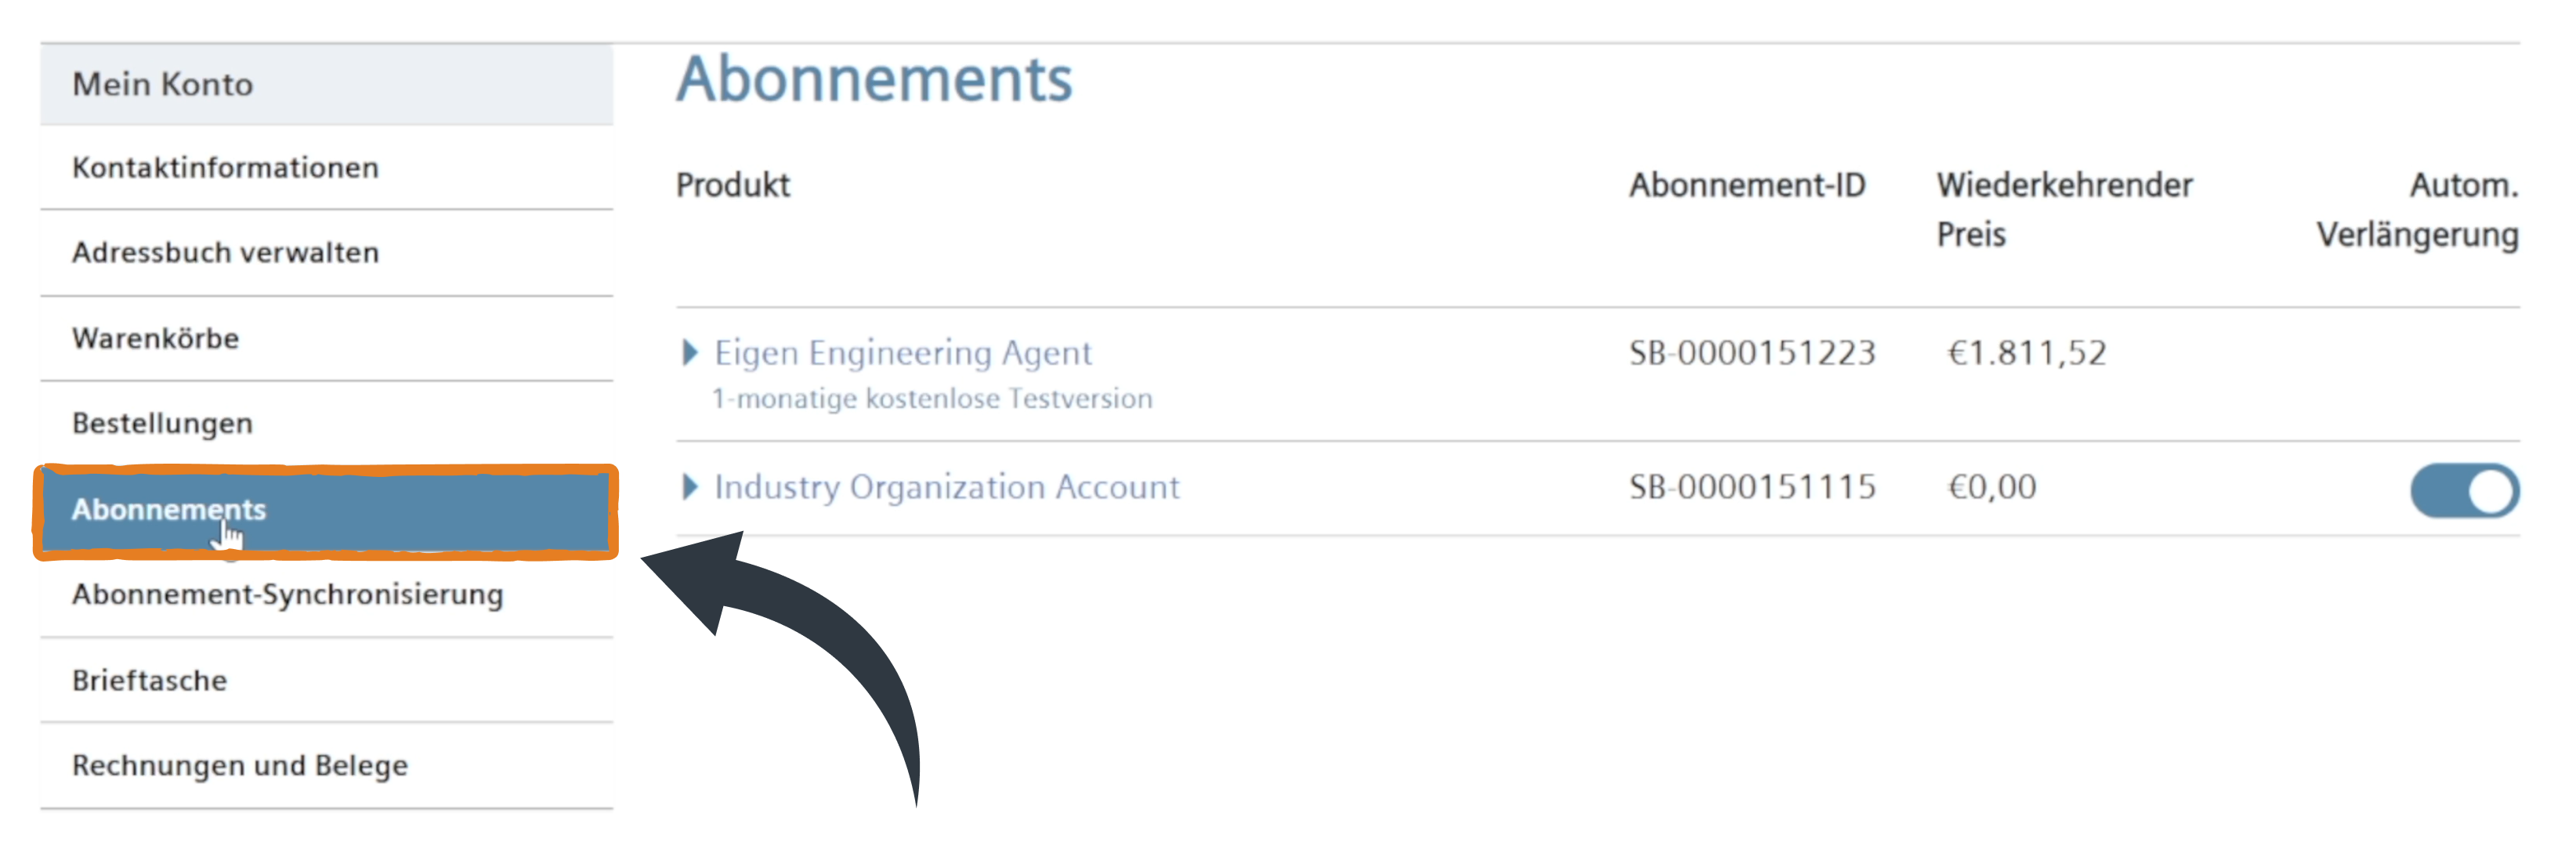
You should now see an overview of your subscriptions, including the Eigen Engineering Agent 1-month free trial. Open the subscription to view its details.

Disabling automatic renewal
Inside the subscription details, look for the automatic renewal option and turn it off. Siemens may ask you to confirm the change, so make sure you complete any additional confirmation steps and verify that the subscription is no longer set to renew automatically.
One small note: I had already canceled my own trial before preparing this tutorial, so the renewal option was no longer visible in my Eigen Engineering Agent subscription. However, the setting is similar to the automatic renewal option shown for the Industry Organization Account.
And don't worry, turning off automatic renewal doesn't mean you immediately lose access to the software. Based on my experience, you can continue using the Eigen Engineering Agent until the end of your one-month trial period.
So if you're only interested in testing the Agent, you can actually disable automatic renewal shortly after activating the trial. That way, you won't need to worry about forgetting to cancel it later.
Just make sure you verify the cancellation status and remaining trial period in your Siemens account.
And there you have it! You now know how to download and install the Siemens Eigen Engineering Agent, including all the additional steps required to get access to the one-month free trial.
We've covered how to find the trial subscription, create the Industry Organization Account, complete the checkout process, locate the download link, install the software, and disable automatic renewal.
And yes, I still think Siemens could have made the whole process a lot easier. When you're offering a new AI tool that's supposed to save engineers up to 50% of their engineering time, having such a complicated sign-up process doesn't exactly make the best first impression.
But once you know which steps to follow, it's much easier to get through the entire procedure without getting stuck along the way. Hopefully, this guide saves you some of the time and frustration I experienced while getting everything up and running.
And now that you've installed the Eigen Engineering Agent, why not see how it can help you improve your next TIA Portal project?
Until next time, stay structured!
-Hans

Download your FREE GUIDE NOW!
5 Simple Steps to Drastically Improve your PLC Program Structure in TIA Portal by Hans Schrynemakers
This is one of my most popular guides, and I’m happy to share it with you for free! Inside, you'll learn about:
- The #1 Way to Eliminate Messy PLC Programming in Just 5 Easy Steps!
- The Proven Method for Building Scalable, Future-Ready PLC Applications in TIA Portal.
- Discover How Modular Design and Structured Data Can Eliminate Costly Errors and Downtime.
- Break Free from Unstructured Programming - Build Clear, Modular TIA Portal Applications with Confidence.
- Master the Techniques that Separate Amateur PLC Programmers from Professionals.